Have created an ISO image from your precious Blu-ray or DVD movie collection and wish to store them on an external USB drive so that you can play the ISO files on Panasonic Viera TV directly through the USB port? However, due to the format incompatible issues and other limitations, you may fail to proceed in the first few steps, the following article will guide you out of trouble with beneficial tips and solutions.
Panasonic Viera TV supported file formats
Before going any further, you shoule be clear of what file formats can be played on Panasonic Viera TV. To get that information, you can consult the user manual or promotional material for the particular Panasonic set to which what file types can be recognized by the TV model. What's worthy mentioning here is that some of Panasonic Viera TV may have extra requirements on the resolution for the playable file formats, it may only play certain files at a specific resolution or within a particular range of resolutions.
The ISO image file is obviously not included in Viera TV supported format list, here, you will need a reliable ISO Converter, such as Pavtube BDMagic for Windows/Mac to convert ISO to Viera TV supported playback formats, and then adjust the output playback settings such as video codec, bit rate, frame rate, resolution and audio codec, bit rate, sample rate and channels to make them adapt with your Panasonic Viera TV. For those people who doesn't have any video background, you can directly use the program to output Panasonic TV preset profile formats with the optimal playback settings.
Properly formatted USB drive
Only a proper file format will not ensure you a successful playback, you still need to form your USB drive to a format that's compatible with your Panasonic Viera TV. You can check the user manual to find the information or do some search on Goole, you will finally get the answer and find that your USB drive needs to be formatted to FAT32. In addition, for different format USB drive, there will be a maximum file size limitation, for FAT32 usb drive, the maximum file size limitation is 4GB.
If the output video is larger than 4GB, you can reduce its file size in the following different ways:
Reduce ISO file size with no quality loss
- Trim or cut ISO files to remove unwanted parts or segments from the video
- Split large video into small parts by file size, count or length
Compress ISO files with some quality loss
- Lower output video resolution
- Lower output video bit rate 20-50% of the default
- Lowering the frame rate of your video to 15 or 10 fps can reduce the file size by as much as 1/2 or 2/3
How to Convert ISO Files for Panasonic Viera TV Playing from USB Drive?
Step 1: Load ISO files into the program.
Launch the program on your computer, click "File" > "Load IFO/ISO" to browse ISO files stored on your local computer drive into the program.
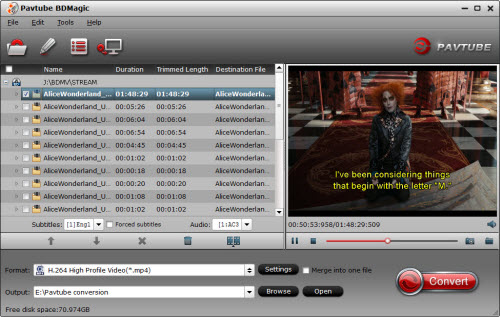
Step 2: Output Panasonic Veria TV preset playable formats.
From "Format" bar drop-down list, directly output Panasonic Viera TV preset profile formats "Panasonic TV(*.mp4)" from "TVs" drop-down list.

Step 3: Reduce ISO file size.
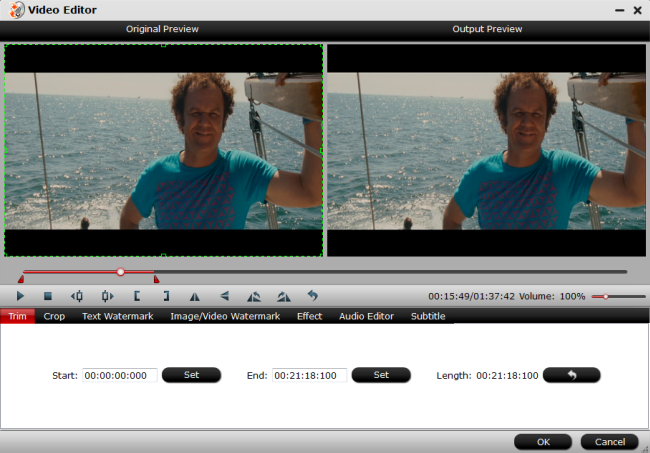
Trim video to shorten video length
Open "Video Editor" window and switch to the "Trim" tab, you can drag the slider bars to include the segment you want to remain, click the left square bracket to set start point, and click the right square bracket to set end point when previewing the video or directly input specific values to "Start" and "End" box.
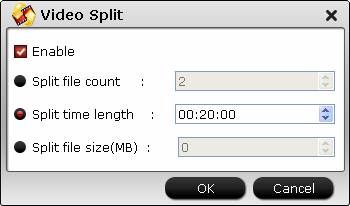
Split large ISO file
By clicking the "Split" button on file list, or from "Edit" menu, you can launch the "Video Split" window. Checking "Enable" to enable it, and then you can split the file by file count, time length, or file size.
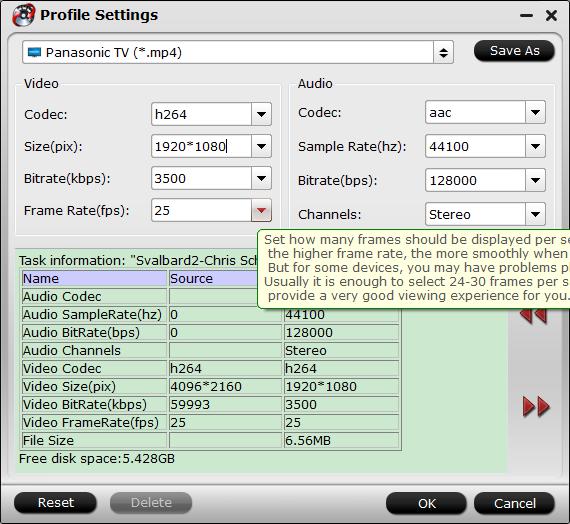
Lower resolution/bit rate/frame rate
Click "Settings" to open "Profile Settings" window, you can change video resolution to a suitable file size, lower the bit rate 20-50% of the default to get small files or lower the frame rate to 15 or 10 fps.
Step 4: Begin the conversion process.
After all setting is completed, hit right-bottom "Convert" button to begin the ISO to Panasonic Viera TV supported formats conversion, trimming and compression process.
When the conversion is completed, you can have no problem to play video on Panasonic Viera TV from external USB flash drive.


