Dr.Fone for Android(Mac) Online Help
Android Data Recovery is an all in one file recovery software which has specially designed to assist you to recover deleted or lost text messages, contacts, text messages, whatsapp messages, videos, call log, etc from Android smartphones and tablets.
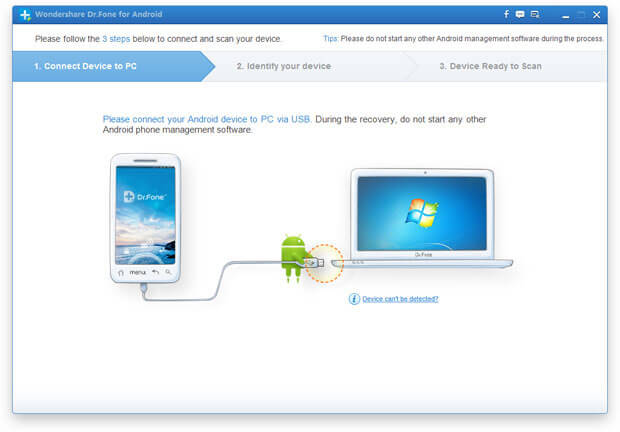
Step 1. Connect Android phone to the computer.
Launch and start Android Data Recovery on your computer, connect your Android phone to your computer via its USB cable.
Step 2: Enable USB Debugging on Android phone.
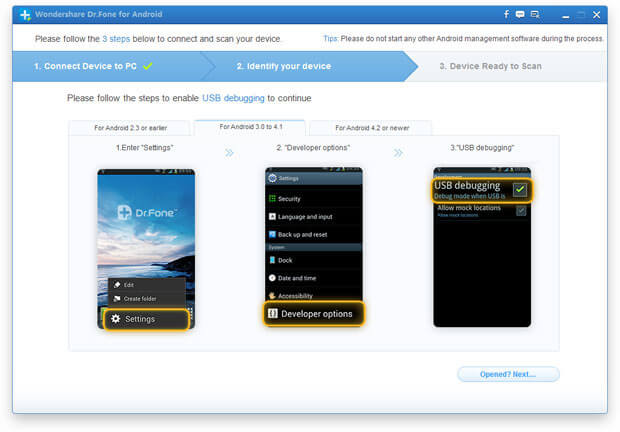
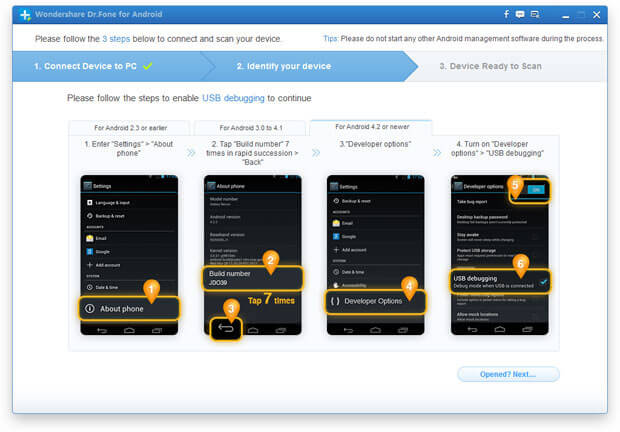
To let the program recognize your Android phone, you should enable the USB debugging on your phone, you can go with the following instructions to enable USB debugging for Android device with different Android version:
1. For Android 2.3 or earlier versions: tap "Settings" > click "Applications" > click "Development" > check "USB debugging".
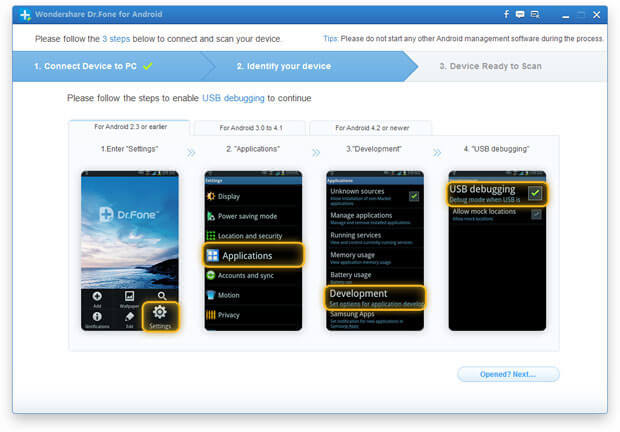
2. For Android 3.0 to 4.1: tap "Settings "> click "Developer options" > check "USB debugging".
3. For Android 4.2 or later versions: tap "Settings" > click "About Phone" > tap "Build number" for about 7 times until getting the note "You are under developer mode". Go back to "Settings" > click "Developer options" > check "USB debugging".
Step 3. Analyze Android Phone
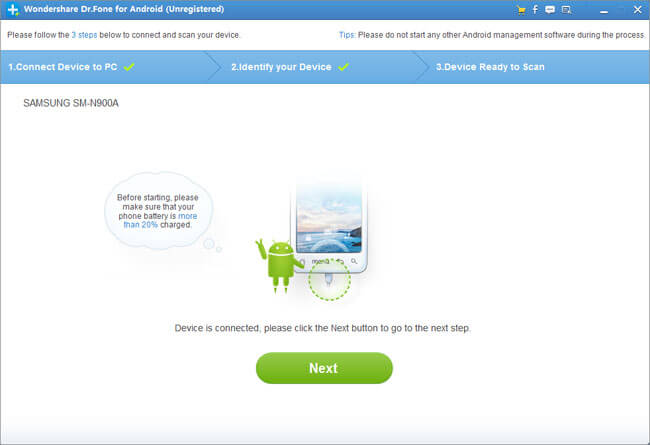
After enabling USB debugging on the Android phone, Android Data Recovery will recognize your device automatically. And then, you should click "Next" to let the program analyze the data on your device. To make it work properly, please make sure there is at least 20% of battery for the phone.
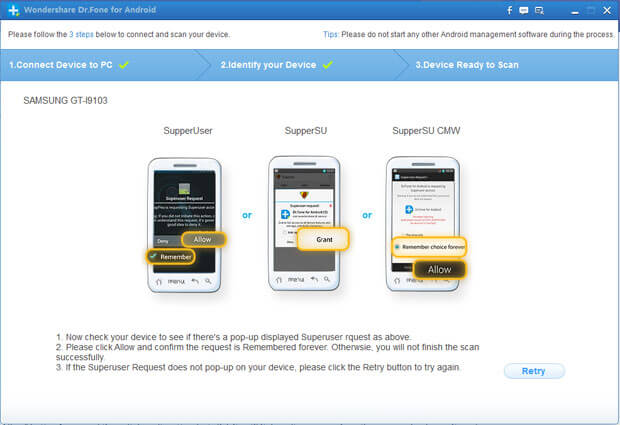
If you have rooted your Android phone before, you need to allow the program Superuser authorization on the screen of your device before the scan. Just click "Allow" when the message pops up on the device's screen. Then back to your computer and click "Start" to scan your device.
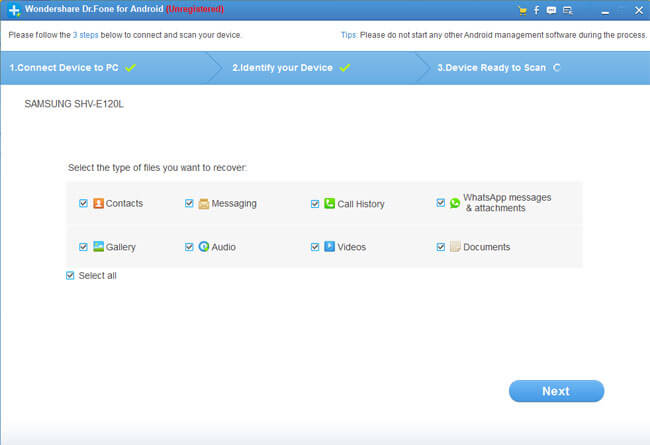
Step 4. Choose File Type and Scan Mode
To save your time for the scanning process, after you click "Next", you'll be asked to select the file type (s) to scan. Since your purpose is to recover deleted text messages on Android, so you should only check "Messaging". By doing this, the program will scan for text messages and message attachments for you. Click "Next" to let the software scan for deleted texts on Android.
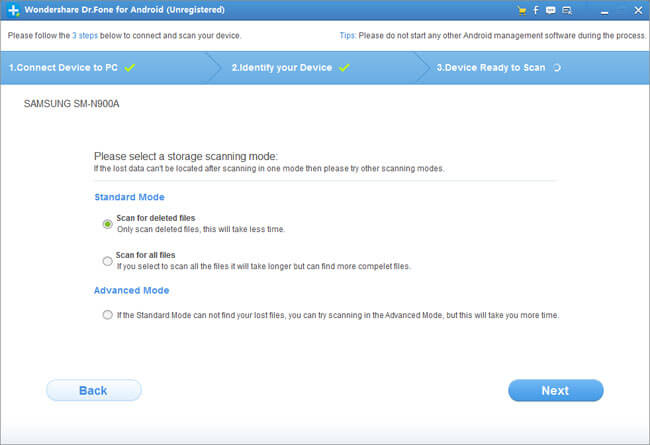
In the newly popped up window, you're offered to select scanning mode: Standard Mode or Advanced Mode. For Standard Mode, it will allow you both scan for deleted files or all files on your Android phone. And Advanced Mode is for deeper scan which will take you more time.
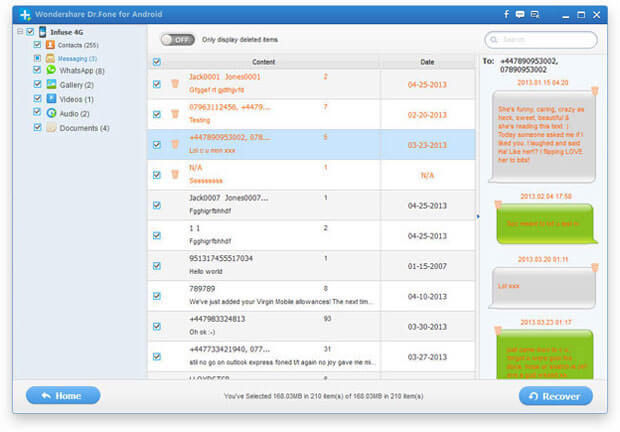
Step 5. Preview and Recover Deleted Text Messages on Android Phone
Click "Next" to let the program scan your Android device for the deleted text messages. In a few seconds, the process should be finished. And then, you're supposed to click "Messaging" in the left sidebar to display all messages. To filter out the deleted text messages, please enable the button on the top of the window "Only display deleted items". To recover deleted texts, just put the check mark in front of these messages and click "Recover" at the lower right of the bottom. In the new pop-up window, select a path on your computer local drive to save these recovered text messages as a HTML or text file.