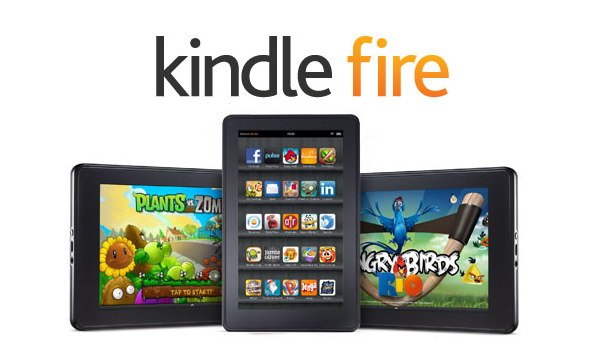
Amazon’s Kindle Fire tablet is a remarkable portable video player. With it, you can purchase movies and TV shows from Amazon’s video store, stream movies from Netflix, and dig through a trove of free movie and TV content during your one-month trial membership to Amazon Prime. Have you ever imaged of playing your own videos or movies you’ve ripped or downloaded with its built-in video player app or other third-party video player software for Kindle Fire tablet? The following article will show you how to make file compatible with Kindle Fire tablets and how to transfer music, video to Kindle Fire/Fire HD/Fire HDX.

Make file compatible with Kindle Fire tablet
Before transferring local video to Kindle Fire tablet, make sure that the file formats are included in Kindle Fire tablet supported formats list as below:
Audio formats: AAC, MP3, MIDI, OGG, WAV
Video formats: MP4, VP8, 3GP, WebM, M4V, 3G2
Note: Please pay attention to the specific parameters like video resolution, bitrate, and frame rate for each supported format because the maximum video resolution is 1920*1080, and the maximum frame rate is 30. You can check on Amazon official site for more details.
If the video or music files that you plan to transfer to Kindle Fire tablet are not included in above list, you can use a third-party video conversion app such as Pavtube Video Converter Ultimate for Windows/Mac (best video converter software review) to convert Blu-ray/DVD disc, H.265/HEVC, MXF, XAVC/XAVC S, AVCHD MTS, M2TS or other incompatible file formats to Kindle Fire tablet readable formats. For iTunes stored purchased music or movies, you can turn to Pavtube ChewTune program to remove drm protection from iTunes video for Kindle Fire tablet playback.
Transfer file to Kindle Fire tablet
There are many different ways to transfer music, video to Kindle Fire tablet, the following article has picked the most three basic ways for you: transfer via USB, Amazon Cloud or hook Kindle Fire tablet to computer.
You can use the micro-USB cable that was included with your device to transfer content from your computer to your Fire tablet with the following steps:
1. From your computer, locate the Kindle content you want to transfer from your computer to your Kindle Fire.
Note: You can use Manage Your Content and Devices to deliver Kindle content to your computer. Visit Manage Your Content and Devices and locate your Kindle content. From the Actions drop-down, select Download & Transfer via USB. From the drop-down, select your Kindle Fire, and then click Download to download the content to a folder on your computer. Not all Kindle content is available for transfer from Manage Your Content and Devices.
2. Connect your Kindle Fire to your computer with the USB cable. Your Kindle appears in the same location on your computer that external USB drives appear.
– Windows: Your Kindle Fire will appear in the Computer or My Computer folder. If you’re using a Windows XP computer, you will need to download Windows Media Player 11, a free application, to complete the USB transfer. To download Windows Media Player 11, go to https://www.microsoft.com/en-us/download/windows-media-player-details.aspx.
– Mac: Your Kindle Fire will appear on the desktop. You will need to install Android File Transfer, a free application, to complete the USB transfer. To download Android File Transfer, go to http://www.android.com/filetransfer.
3. Open the Kindle Fire folder (titled “Kindle”) on your computer, and then open the Internal storage folder.
4. Locate the downloaded file on your computer, and then drag and drop the compatible file you want to transfer into the applicable folder:
– Audible: AA, AAX
– Books: AZW (.azw3), MOBI (non-DRM), KF8
– Documents: TXT, PDF, PRC, DOC, DOCX
– Music: MP3, non-DRM AAC (.m4a), MIDI, PCM/WAVE, OGG, WAV
– Pictures: JPEG, GIF, PNG, BMP
– Movies: MP4, 3GP, VP8 (.webm)
5. Disconnect your Kindle Fire from your computer.
6. From your Kindle Fire, tap a content library (for example, Books) in the top navigation, and then tap the Device tab to view your Kindle content.
If you are buying all your apps, music, movies, and books on Amazon, Amazon automatically saves it in the “cloud” and you can simply login on your computer to Amazon and transfer everything that way. You don’t even need to hook your computer up to your Kindle Fire. You can choose to access your content through the Cloud while your Kindle Fire HD is connected via Wi-Fi, or to download your content to your device for easy access even when your device isn’t connected wirelessly.
Step-by-step Instructions:
To download content from the Cloud to your device:
Confirm that your Kindle Fire HD is connected to Wi-Fi.
1. Tap the Cloud tab within the Games, Apps, Books, Music, Videos, Newsstand, Audiobooks, Photos, or Docs libraries.
2. Tap an item in the Cloud to download it to your Device tab.
Hook the Computer and Kindle Fire Together
Take the larger end of the cable and connect it to the USB port on the computer. Many computers have this on the front of the computer now. Once you’ve hooked the cable to the computer, the smaller end goes into the Kindle. This plugs into the same place where you would plug in the cord to charge the Kindle. Once you’ve got the two linked together, you will be able to transfer files from one to the other.
Once the Kindle is connected to the computer, the Kindle’s screen will show a “You can now transfer files from your computer to Kindle” message. Your computer will likely recognize the Kindle and you can click on that icon in the “My Computer” screen to open the files. You will be viewing everything on your main computer monitor to transfer files to and from the computer and the Kindle. You can use a drop and drag method to put files on your computer from the Kindle.