If you have a vehicle with the in vehicle entertainment system, it would be possible for you to take USB as an optional video source to transfer all your favorite movies or videos on a flash drive and tried to play them on your vehicle. However, although it is already in 2015, you may find that your vehicle entertainment systems still using a 13 year old Codec called DivX, which does not offer you the greatest quality but large in file size.
To take full advantage of this vehicle car entertainment system, you can gather all your available videos and movies together to transfer and put them on that USB flash drive. It is definitely that not all those videos and movies will be recognized by your vehicle entertainment, you will need to perform a video "Transcoding" process to convert them in their original file formats to Divx format. There are lots of free guides to teach you how to use Handbrake to rip Blu-ray/DVDs or use VLC to convert YouTube downloaded videos, our article won't go into that here, we will show you a more powerful and intuitive way to complete the format conversion process with a tool called Pavtube Video Converter Ultimate (best Video Converter Ultimate Review).
The program is armed with comprehensive solution to transcode all your available sources including Blu-ray & DVD disc movies, 4K/2K/HD/SD file resolution video with the formats of AVI, WMV, MP4, MOV, MPEG, VOB, FLV, Tivo, Divx, Xvid, XAVC, XAVC S, AVCHD(MTS, M2TS), MXF, H.265/HEVC, etc to Divx format with perfect output quality and super fast conversion speed.
To save space for your USB flash drive, you can reduce your Divx file size with 3 different ways offered by this video movie compression software:
Trim video length: Remove unwanted parts from your video to select only your wanted clips to be converted. This method will not cause any quality loss to your video.
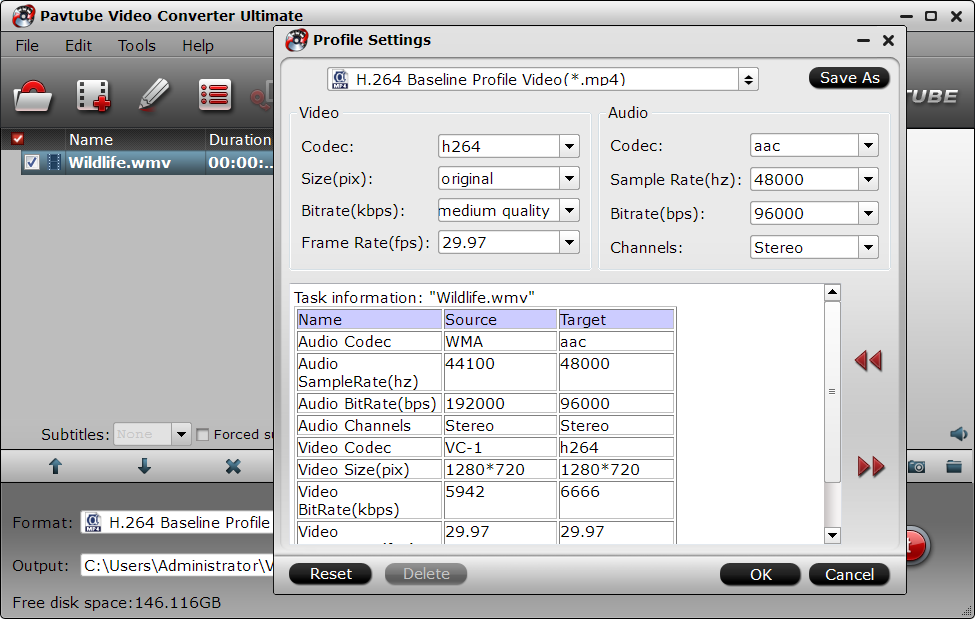
Lower output video file resolution: Open "Profile Settings" window, from "Size(pix)" drop-down list, select a lower resolution file resolution for the output video file. Make sure to keep a balance on the file size and file quality.
Lower video bit rate: lower the bit rate 20-50% of the default video to get small files.
For your convenience, the program has both Windows and Mac version, for Mac users, you can download Pavtube iMedia Converter for Mac (support Mac OS X El Capitan) to get the job done.
How to convert and compress video movies to Divx for car entertainment system?
Step 1: Load video movie files to the program.
Click "File" drop-down option to locate and select the files you want to convert. To load Blu-ray or DVD disc, insert your Blu-ray or DVD disc into its optical drive, click "File" > "Load from disc" option to add Blu-ray/DVD disc to the program, when both Blu-ray or DVD disc exists, the program will load DVD disc first.

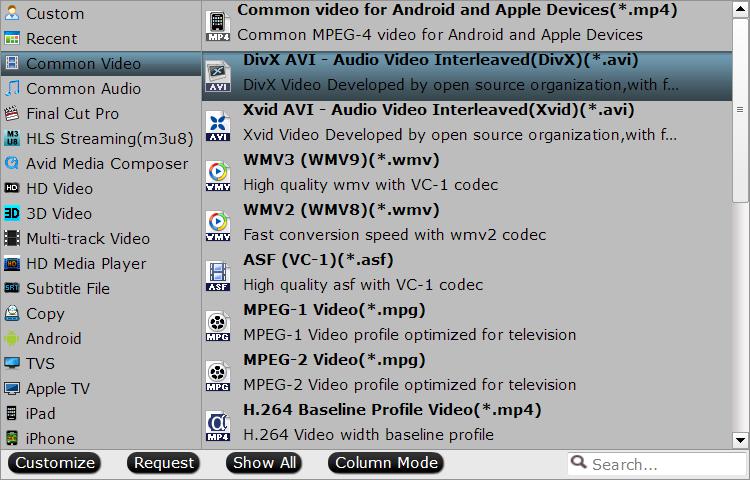
Step 2: Choose Divx as output file format.
Click "Format" bar, from its drop-down options, choose to output car entertainment system compatible format by following "Common Video" > "Divx AVI - Audio Video Interleaved (Divx)(*.avi) ".
Step 3: Reduce output video file size in three different ways.
Trim video length
Open "Video Editor" window, switch to "Trim" tab, drag the slider bar to set the start time and ending time to select your unwanted parts to be converted.

Lower output file resolution and bit rate
Open "Profile Settings" window, choose a small value from the output file size and bit rate drop-down brackets.
Step 4: Start the conversion.
Start video movie to Divx conversion and compression process by hitting the right-bottom "Convert" button.
When the conversion is completed, you will get a most compatible file format for playing on your car entertainment system with optical USB flash drive.
Install the Flash drive in your Car and Test it!
In you center console, you'll see a USB Port behind a little dummy door. Open that door and insert your flash drive.
Now power up your system. You can use either the front screen or the remote to change the source to USB. Press Play and Viola! You should start seeing your videos playing on screen. By default, they'll just play in alphabetical order which might be fine. If you'd like to change the order, just stick he drive back in your computer and put a number in front of each video. Since the system will sort by numbers before letters, it will let you order the videos however you'd like. You also have the option of sorting files into folders which you can skip via the remote or the front screen.
If you need to control the rear DVD player, just press the AUX button. You can even press List button to see all of the files on disc. In case you didn't know, you won't be able to see the video on the front screen unless you press the parking brake.


