ScreenFlow is a very polished screencasting application, with which you can record any part of your monitor while also capturing a video camera, iOS device, microphone and more. With ScreenFlow, you can record video files as MP4, MOV, M4V formats so that you can directly publish your ScreenFlow recordings to your YouTube, Vimeo, Wistia, Facebook, Google Drive or Dropbox.
To be precise, the ScreenFlow presets use the x264 codec to encode to H.264 video format,wrapped in an MP4 container. (As a comparison, some old version ScreenFlow presets used the Apple H.264 codec to encode H.264 format, and wrapped it in a .MOV container). There Screenflow recordings can be played in Quicktime, Windows Media Player 12, Flash, and iOS devices finely. But if you screen capture a MP4 video with Screenflow and later you want a MOV format, what whould you do? Or how can you do when you want to use Screenflow to export AVI, ProRes formats? In this case, you need to convert Screenflow recordings to the format you want.
How to Convert Screenflow Recordings to MP4, MOV, AVI, ProRes on Mac?
If you saved a Screenflow recordins in a wrong video format, you can use a video converter for Mac to transcode Screenflow recordings to the format you want then you can play and edit Screenflow recordings freely without format and codec incompatibility issues. A Web search about Screenflow video converter on Mac, we found that Pavtube iMedia Converter for Mac is the best one to help you convert and simple edit Screenflow recordings.
This top-notch all-in-one video converter can convert any format Screenflow recordings to another video and audio format with super fast conversion speed and do some simple editing on the Screenflow recordings before output so that you can enjoy the Screenflow recordings better finally. This Mac Screenflow Video Converter is fully compatible with macOS Sierra, Mac OS X 10.11 El Capitan, Mac OS X 10.10 Yosemite, Mavericks and more. Thus, you never need to worry about the software crash issues on your new Mac OS X.
|
Get The Best Screenflow Video Converter for MacConvert Screenflow recordings to MP4, MOV, ProRes, DNxHD, QuickTime and more on Mac. Re-encode your Screenflow recordings to FCP X, iMovie, After Effects, QuickTime, Vegas Pro, etc. Merge multiple Screenflow recordings into a single one file. Trim theScreenflow recordings footage and crop Screenflow recordings border. Add external subtitles to the Screenflow recordings. Remove the audio from recorded files and replace an audio in the Screenflow recordings. |
|

Step by Step to Convert Screenflow recordings to MP4, MOV, AVI, ProRes on Mac
Step 1: Import Screenflow recordings
Start the Screenflow recordings video converter program on your computer, click "File" > "Load Video/Audio" or "Load from folder" button to import Screenflow recordings into the program. "Drag-and-Drop" and "Batch Conversion" features are also supported. Besides Screenflow recordings, you also can load some other recordings captured with other screen recorders for Mac.

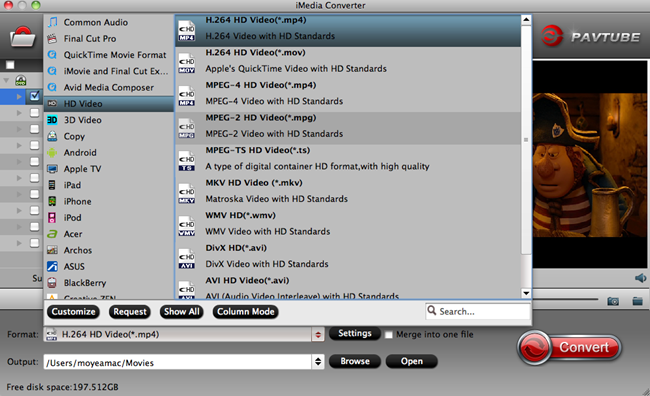
Step 2: Choose output format
This Screenflow Video Converter for Mac offers multiple video and audio formats. You can choose any one you need. If you want to play Screenflow recordings on QuickTime, you can choose QuickTime MOV format. This format is also supported in iMovie and FCP x. If you want to upload your Screenflow recordings to YouTube, Vimeo, etc, you can choose HTML5 WebM, MP4, etc format.
Edit Screenflow recordings Before Export
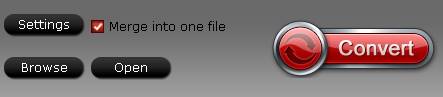
Merge Screenflow recordings files into one: By ticking off “Merge into one file” option behind “Settings” button, you can merge the ticked files in list into one single file.
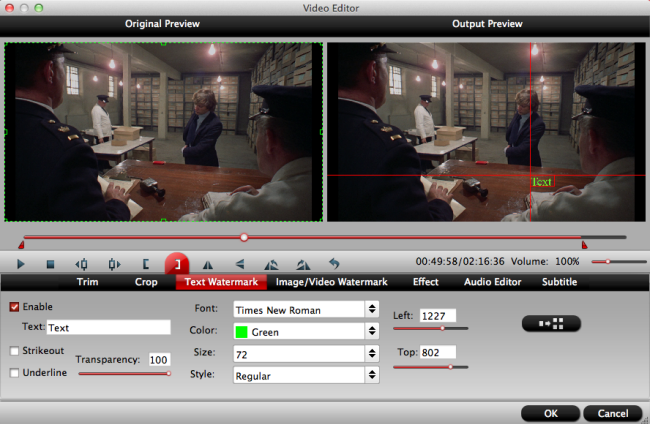
Trim Screenflow recordings: In “Video Editor” there are seven edit tabs: Trim, Crop, Text Watermark, Image/Video Watermark, Effect, Audio Editor and Subtitle. The "Trim" feature allows users to decide where to start and where to end when converting the Screenflow recordings clip, so that unwanted segments will be cut out after conversion.
Crop Screenflow recordings: The "Crop" facility enables users to get rid of the black edges and unwanted area of the image.
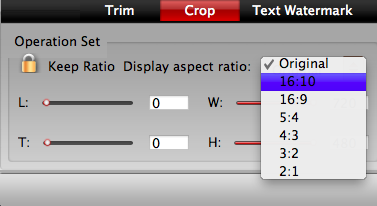
Keep original Screenflow recordings aspect ratio and cropped aspect ratio
To keep original aspect ratio, users need make sure the "Display aspect ratio” and the "Size (pix)" in "Settings" option are all set as "Original". If you want to keep the cropped aspect ratio, Pavtube software offers several aspect ratios for you to choose from, including 16:10, 16:9, 5:4, 4:3, 3:2, and 2:1.
Add Watermark to Screenflow recordings: You can add text/video/image watermark to selected Screenflow recordings clip. You can either set parameters or drag the text on preview screen to set its location.
Audio Editor:You can either replace/remove original audio in the Screenflow recordings, or set audio fade in/out effects.
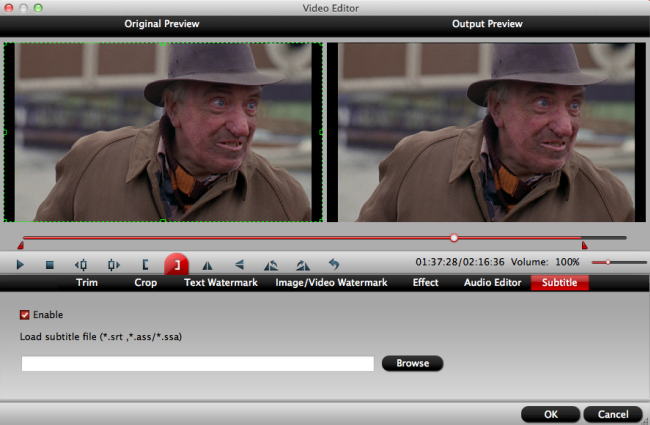
Subtitle: In this tab, you can add *.srt or *.ass/*.ssa subtitle-files to the Screenflow recording video as hard subtitles.
Step 3: Start to convert Screenflow recordings
Clicking the Convert button on main interface, you can go to Conversion window to start to convert Screenflow recordings to MOV, MP4, AVI, etc on Mac. After the conversion, you can click Open output folder to popup output directory with the converted files.
Now, you can upload your Screenflow videos to YouTube, Vimeo, Wistia, Facebook, Google Drive or Dropbox and play the Screenflow clips with QuickTime or edit the Screenflow recordings in FCP X, iMovie, etc.


