Screen recorders for Mac are pieces of software that allow you to record whatever is happening on your Mac screen then you can create instructional videos to port onto YouTube or make demos to show off your apps. If you are a Mac user and looking for a screen recording software for Mac OS X to record your Mac screen, look no further – we have you covered with the top best 10 picks for Paid and Free Screen Recorder for Mac.
Best Paid and Free Screen Recorder for Mac
#1: QuickTime Player (free)
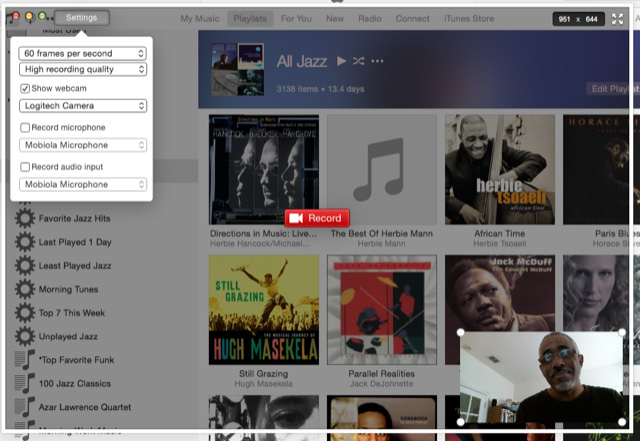
For a quick, cost-free solution, Apple’s default media application QuickTime is ready and waiting for screen recordings. With the QuickTime recording features, you can create brief tutorials for your students that demonstrate common tasks they need to know how to complete on their computers.

How to create a new screen recording with QuickTime Player?
1. Launch QuickTime Player and choose File, New Screen Recording (the keyboard shortcut is Control, Command, N).
2. Press the Record button.
3. A screen with additional instructions will appear. Choose Start Recording and begin your tutorial.
4. When you’re finished, click on Stop Recording on the Menu Bar.
5. To edit your recording, click on the arrow on the right side of the QuickTime controller at the bottom of the window and choose Trim.
6. Drag the handles to select only the frames you want to keep in your recording.
7. When you’re happy with your selection, choose Trim. The grayed out frames will be removed from the beginning or end of your recording.
8.To save your edited tutorial, choose File, Save As.
9. Select a format and save location, then choose Save. Your tutorial will be ready for upload to a website where students can access it.
#2: Camtasia Studio ($99)
Camtasia Studio is one of the most famous and professional screen recording software available for Mac OS and is offered for a price of $99. With the extensive layout, the user can make smooth editing and mixing on the recorded video. Camtasia also offers a series of visual effects, including a unique “green-screen” mode that allows you to insert yourself into the video, as if you were a part of the action yourself.
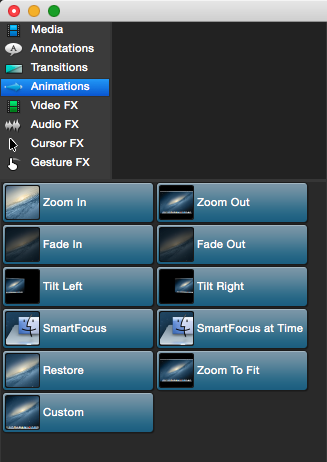
Camtasia’s most useful and unique features are smart animations. For instance, you can drop a SmartFocus animation onto the timeline, and Camtasia will make some guesses about where to zoom and pan based on where you cursor was placed on the screen during the time of the recording.
#3: Snagit ($25)
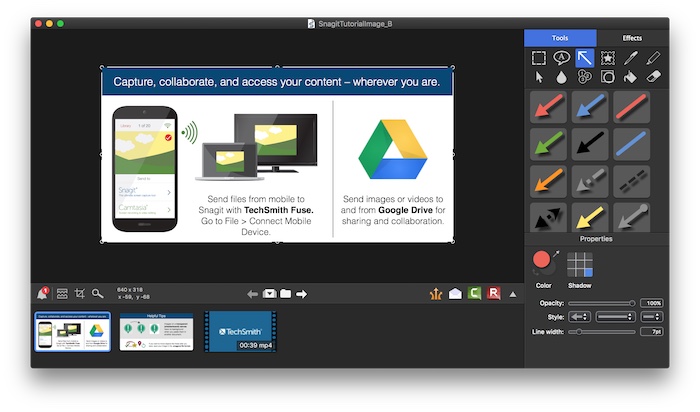
Snagit software gives you the complete tool for screen capture and video recording on Windows and Mac. Combine traditional screenshots, video recording, image editing, and file sharing. It's fast and easy to visually explain anything on your screen. The focus of Snagit is on annotation of your screen captures – both in stills and video formats. Akin to Camtasia, this program, too, allows importing mobile video and images via Fuse, and offers extensive sharing options, including the ability to export projects directly into Camtasia.
Select the Recording Area
- Open or set up what you want to capture. Click the Video Capture button. Click the Capture button.
- The orange crosshairs appear. Drag the cursor until an orange border appears around the entire screen. Dragging the cursor to the top or side of the screen is usually the best way to highlight the entire screen. Click to select the highlighted area.
- After selecting the area, you can drag the borders to change the recording area.
Set Up the Audio for a Recording
After selecting the area to record, the Video Recording toolbar appears under the selected area. You can select to record microphone audio or system audio with a video recording.
Start, Pause, or Stop the Recording:
- Start
Click the Record button or press SHIFT+F9. The recording countdown starts. - Pause
Click the Pause button or press SHIFT+F9. Click this button again to resume the recording. - Stop
Click the Stop button or press SHIFT+F10.
The video is recorded as a MPEG-4 and is saved in the AutoSave folder. You can preview and share the video within Snagit Editor.
#4: ScreenFlow ($99)
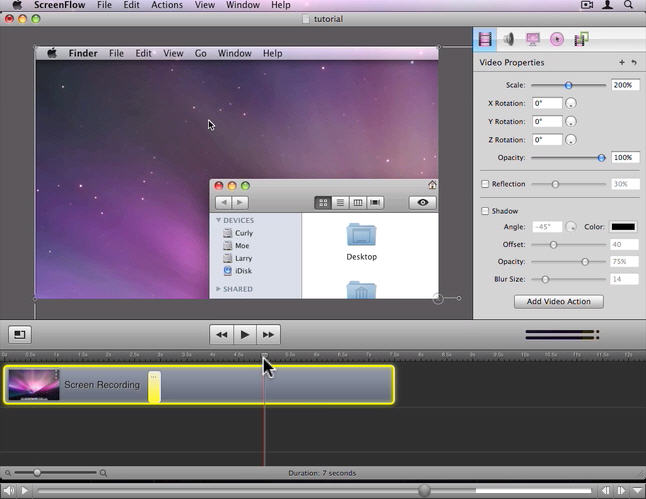
ScreenFlow is a lightweight and intuitive program for capturing videos of your screen and then processing them into professional-looking finished products. With just a few clicks, you can start recording. When you're done, you'll have a great lineup of editing tools at your disposal as well. With ScreenFlow, you can add annotations, callouts, and display one or more video clips on top of the main video.
#5: Monosnap (free)
Monosnap is another quick screenshot and video recording application similar to Snagit. Unlike other software Monosnap can work with multiple screens, offers fast upload, comes with 8x magnifier that allows grab pixel-perfect area. Also you can customize program hotkeys, and update process is maximum automated and easy - just click the notification and all schanges are done in a second.
Monosnap is for developers, designers, advanced users - for those who need to attach screenshot to a bug report, share a piece of Skype dialogue etc.
A Software Makes Your Screen Recorded File Playback and Editing More Convenient
Some Screen Recording Software for Mac will capture screen video as AVI, MPEG, MKV, WMV, etc format and these formats can be supported by many multimedia devices and software. But sometimes, the video has some special codec, which cause playback and editing issues. In this case, you need a video converter to transcode the recorded files to another more popular video codec and formats. Pavtube iMedia Converter for Mac is the best tool to handle your screen recorded files.
Key Features:
1. Convert any screen recorded file format to MP4, MOV, ProRes, DNxHD, QuickTime, WMV and more for sucessful playback and editing.
Guides: Fraps to Sony Vegas Pro | OBS to Sony Vegas Pro | Shadowplay to Sony Vegas Pro
2. Re-encode your screen recorded files to another codec such as H.264, H.265, MPEG-2, DivX, XviD, WMV1, etc.
3. Merge multiple recorded files into a single one file.
Guide: Merge 4K video
4. Trim the recorded file footage to determain where to start and end.
Guide: Trim/Cut Video Files Without Re-Encoding
5. Add external subtitles to the recorded files.
Guide: Add SRT/ASS/SSA Subtitles to MP4 Video
6. Remove the audio from recorded files and replace an audio to the recordings.
Guide: Replace Audio in Video
7. Crop screen captures' the black bar or unwanted the border.
If you want to learn more about Pavtube iMedia Converter for Mac and how to use it, please read Start Using Pavtube iMedia Converter for Mac


