After you've complete your video editing in Final Cut Pro, you can easily following the steps below to upload Final Cut Pro project to YouTube:
1. Go to "File" option on the option Bar.
2. Then go to "Share" option.
3. A small window will appear on the screen with Option "Info" and "Setting".
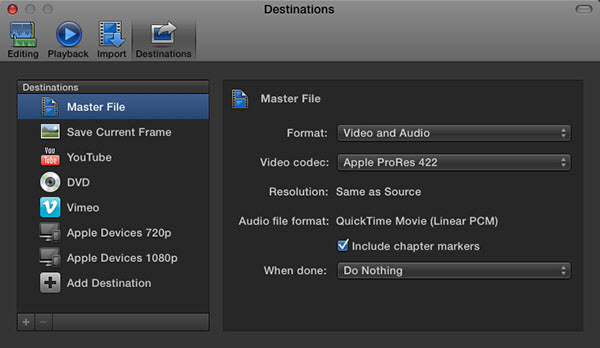
4. After clicking on "Settings", a menu will appear, you can select format for your video.
5. After this again go to "File" option and then go to "Share" button.
6. Click on "YouTube" to upload and get the output file simultaneously.
7. Sign in to your YouTube account by Clicking on "Sign In".
8. Then go on the "Next" button.
9. On next window click on "Publish" to upload your video.
Best FCP project settings for YouTube Uploading
Although you can directly upload FCP video to YouTube on the interface of FCP, however, you may that the uploading video quality of the FCP video is not that satisfactory. To get the best result, you must be clear of YouTube best uploading formats and settings.
Best uploading formats and settings for YouTubeAlthough YouTube has native support for lots of uploading formats including .MOV, .MPEG4, .MP4, .AVI, .WMV, .MPEGPS, .FLV, .3GPP. .WebM, however, you are highly recommended to use the following format and settings if you wish to achieve a smooth YouTube uploading process and a perfect uploading video quality.
Container: MP4
Audio codec: AAC-LC
Channels: Stereo or Stereo + 5.1
Sample rate 96khz or 48khz
Video codec: H.264
Progressive scan not interlacing
High Profile
2 consecutive B frames
Closed GOP. GOP of half the frame rate.
CABAC
Variable bitrate, no bit rate limit required, though we offer recommended bit rates below for reference,
Chroma subsampling: 4:2:0
Frame rate
Content should be encoded and uploaded in the same frame rate it was recorded.
Common frame rates include: 24, 25, 30, 48, 50, 60 frames per second (other frame rates are also acceptable).
Interlaced content should be deinterlaced before uploading. For example, 1080i60 content should be deinterlaced to 1080p30, going from 60 interlaced fields per second to 30 progressive frames per second.
Bitrate
Recommended video bit rate for upload
| Type | Video Bitrate, Standard Frame Rate (24, 25, 30) |
Video Bitrate, High Frame Rate (48, 50, 60) |
| 2160p (4k) | 35-45 Mbps | 53-68 Mbps |
| 1440p (2k) | 16 Mbps | 24 Mbps |
| 1080p | 8 Mbps | 12 Mbps |
| 720p | 5 Mbps | 7.5 Mbps |
| 480p | 2.5 Mbps | 4 Mbps |
| 360p | 1 Mbps | 1.5 Mbps |
Recommended audio bit rate for upload
| Type | Audio Bitrate |
| Mono | 128 kbps |
| Stereo | 384 kbps |
| 5.1 | 512 kbps |
The bitrates below are recommendations for uploads. Audio playback bitrate is not related to video resolution.
Get best FCP video YouTube uploading settings
Have no idea how to get best YouTube uploading settings from FCP video? No need to worry, you can easily make that by downloading Pavtube Video Converter Ultimate for Windows/Mac, which not only assists you to convert FCP MOV video to YouTube best compatible H.264 High Profile video codec and AAC audio codec, but also allows you to flexibly adjust other output profile parameters such as video resolution, bit rate, frame rate and audio bit rate, sample rate or channels to output best YouTube uploading settings listed above.
YouTube upload video length and file size limitationThe largest file size that YouTube supports to upload is no larger than 2GB, if your video is larger than 2GB, you can use our program to split the large file size into small clips by file size, count or length with no quality loss. The default upload video length for YouTube is no longer than 15 minutes, if your video is over 15 minutes, you can use the trimming function offered by the program cut off unwanted parts or segments.
How to Upload and Share FCP Video on YouTube with Best Format and Settings?
Step 1: Load FCP video into the program.
Launch the program on your computer, click "File" menu and select "Add Video/Audio" or "Add from folder" to import FCP videos into the application.

Step 2: Output Youtube best uploading format video.
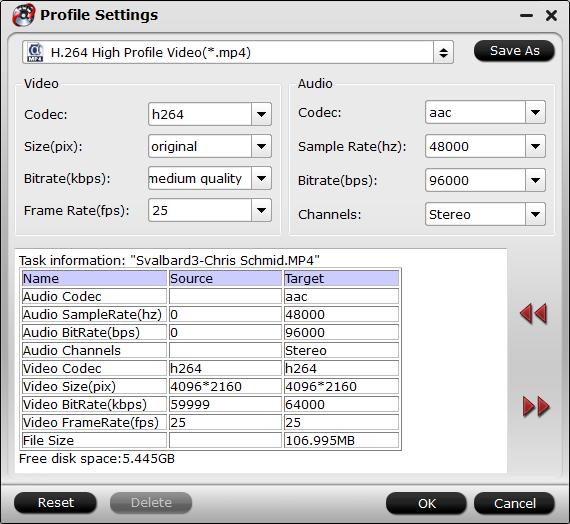
Click "Format" bar, from its drop-down options, choose YouTube best compatible uploading format from "Common Video" > "H.264 High Profile Video(*.mp4)".

Step 3: Tweak encoding settings for YouTube upload.
Click "Hit "Settings" to open the "Profile Settings" window, here you can adjust the output video codec, resolution, bit rate, frame rate and audio codec, bit rate, sample rate and channels to let them fit them YouTube.
Step 4: Start the conversion process.
After all settings is completed, hit right-bottom convert button to begin the conversion from FCP video to YouTube best uploading formats and settings.
When the conversion is completed, click "Open Output Folder" to pop out the window with converted YouTube best uploading formats and settings.


