It is really a enjoyment to watch Blu-ray and DVD videos with high resolution on wide screen TV at home. The only drawback of Blu-ray and DVD is that the disc limits the way and the place you view the videos. Every time you want to watch your Blu-ray and DVD disc, you need to get the disc you need and insert it to the drive. It is not the way to watch movies in Home Theater. The best way is to copy DVD and Blu-ray to NAS to play Blu-ray and DVD movies in Home Theater. If you don't want to cost a penny on NAS, you can build your own NAS system with Nas4Free then copy Blu-ray and DVD to the Nas4Free NAS Server.
The biggest point of NAS4Free is the ZFS file system. You can expand ZFS storage easily on NAS4Free to store more Blu-ray and DVD movies. And it is easy to build a NAS using Nas4Free. You can read the following part to build a NAS server with Nas4Free and make backup copies of Blu-ray and DVD to Nas4Free NAS server.
Quick Reading
Part 1: How to Build NAS using Nas4Free
Part 2: how to copy Blu-ray and DVD to Nas4Free NAS
Part 1: How to Build NAS Using Nas4Free?
The installation and configuration is relatively simple however, creating a Windows Share drive that you can mount as a drive letter is a little tricky. But you can do it as the steps below shared on geekmusthave.
Login to NAS4Free server
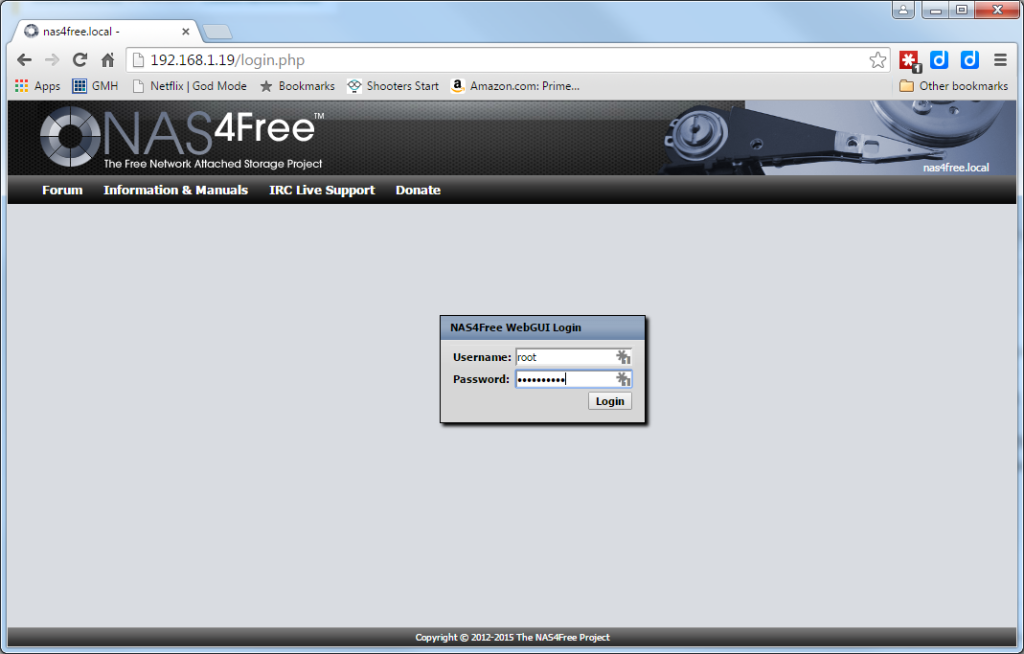
After the installation is completed the NAS4Free console will let you know the IP address of the server, in this example it is 192.168.1.19 as determine by the network DCHP server. Open a browser to this page to get the login
Setting up ZFS filesystem
It is recommended that you create a ZFS file system to take advantage of multiple disks, in this example there are two 4TB physical drives in the desktop server.
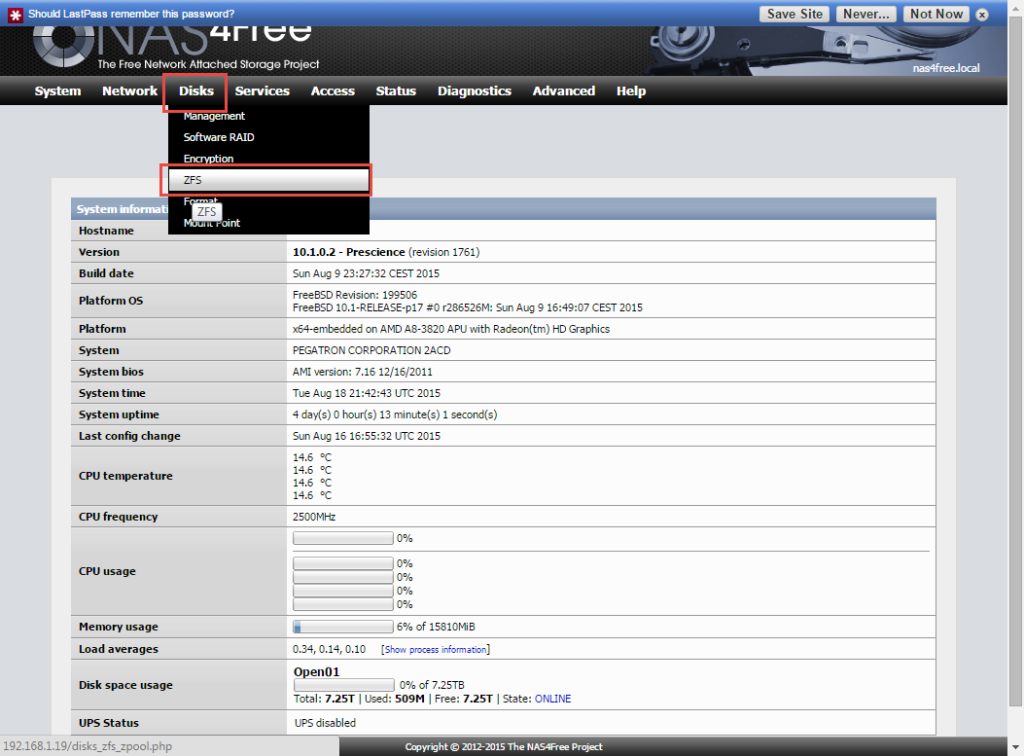
The main screen of NAS4Free displays some basic information about the system and its utilization. The ZFS is located under the (Disks) menu selection.
The first step in a ZFS file system is to create a virtual drive from your collection of physical disks.
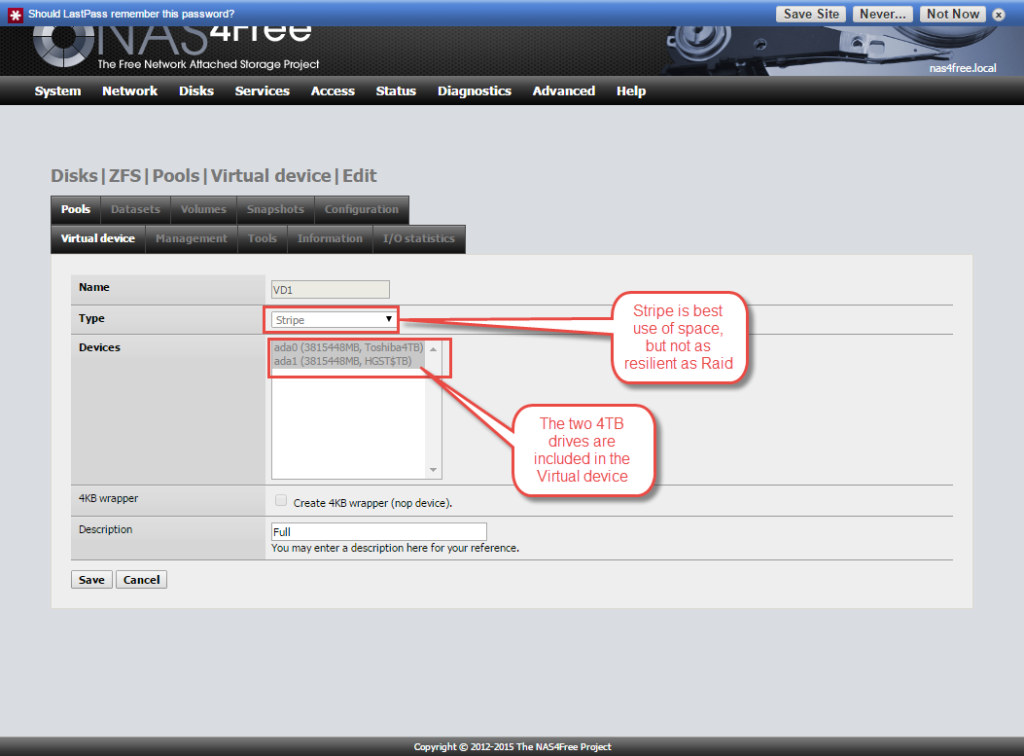
The Type of Virtual Disk indicates how you want to configure the drives to recover from errors. In this example (Stripe) was selected to get the maximum amount of space. The Virtual Disk name is (VD1)
The second step is to create a Pool that we can use to set up the Windows share from.
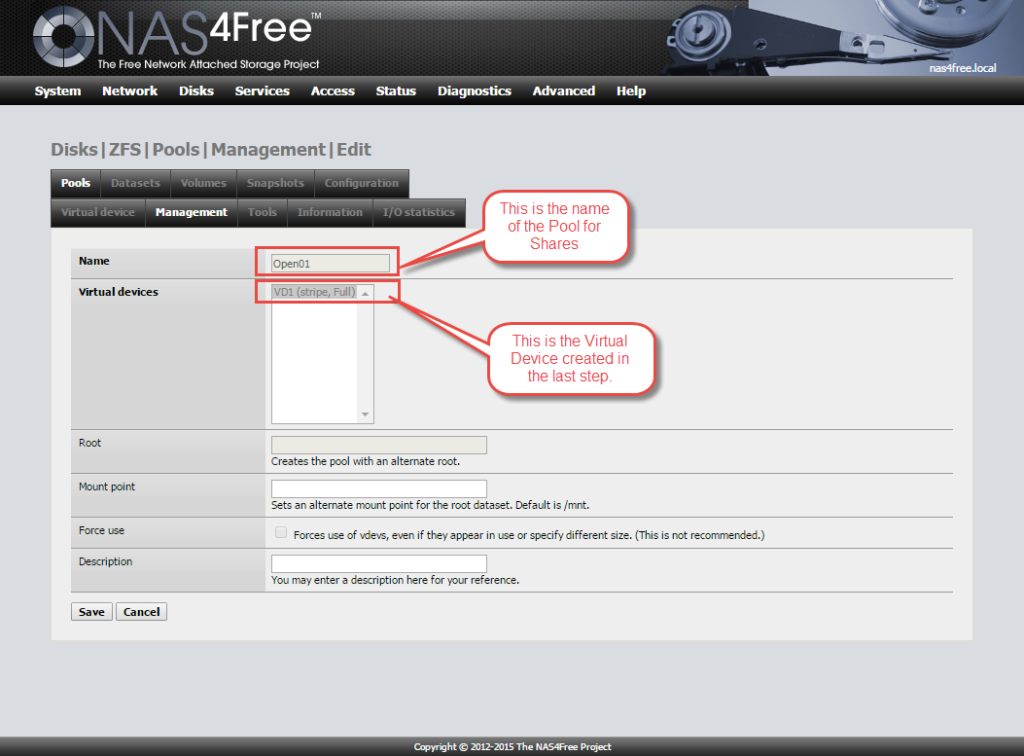
Now we have created a Pool called (Open01) from the Virtual Disk (VD1).
Configure CIFS/SMB service
Third step which is the tricky one is to configure the CIFS/SMB Service on NAS4Free. This is required for creating Windows Shares. This is done under the (Services) menu selection.

Fourth step is to configure the CIFS/SMB service.
The defaults for the CIFS/SMB service are typically good for most installations.
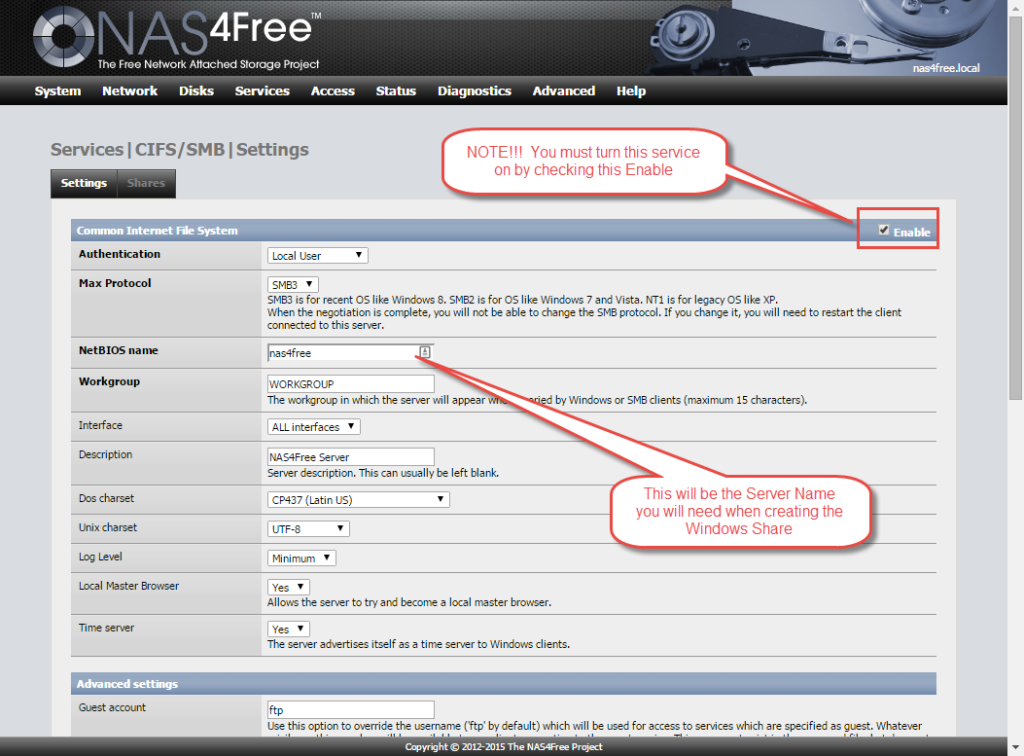
The Max Protocol was set to SMB3 to allow use of Windows 8.x systems to access the shared drive. The NetBIOS name is actually the server name used when creating the Windows share.
Fifth step is to create the shares by clicking on the SHARE tab on the top of the previous image
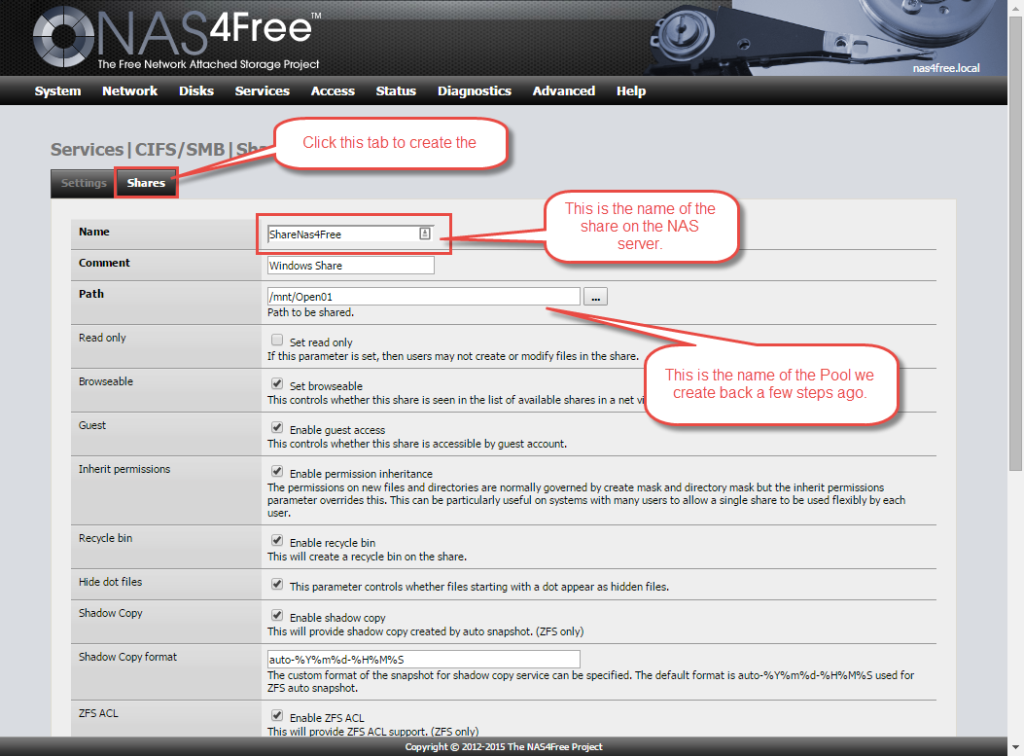
The Name (ShareNas4Free) is the windows share name. You can create multiple share names and isolate shares for specific purposes. The shares come from the Pool we created called (Open01).
Create Windows Share
Sixth step is to go to the Windows Explorer on one of the systems you want to use the NAS4Free share drive on and created a mapped drive.
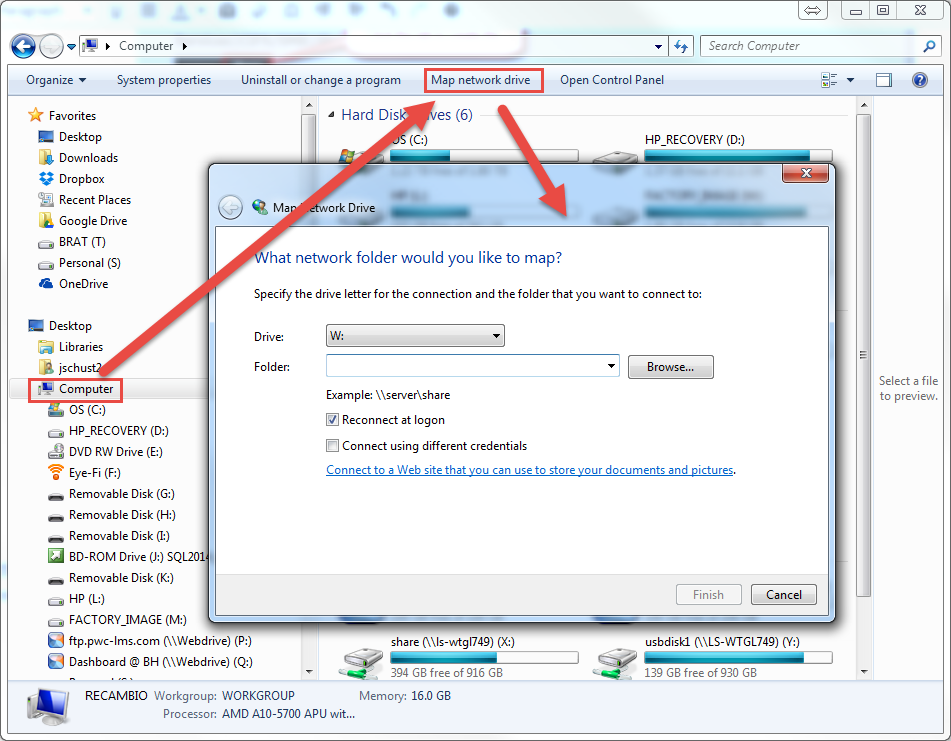
Seventh step is to locate the shared drive. You can try to use the (Browse…) button but sometimes the newly created share is not immediatley available. So the alternative method is to enter the share name in the Folder field. In this example the share name is \\NAS4Free\ShareNAS4Free.

When you are successful on getting the NAS4Free share name entered you will be prompted for a NAS4Fee user to access the share. If you haven’t created a special user for this share you can use the default NAS4Free admin user (Root).
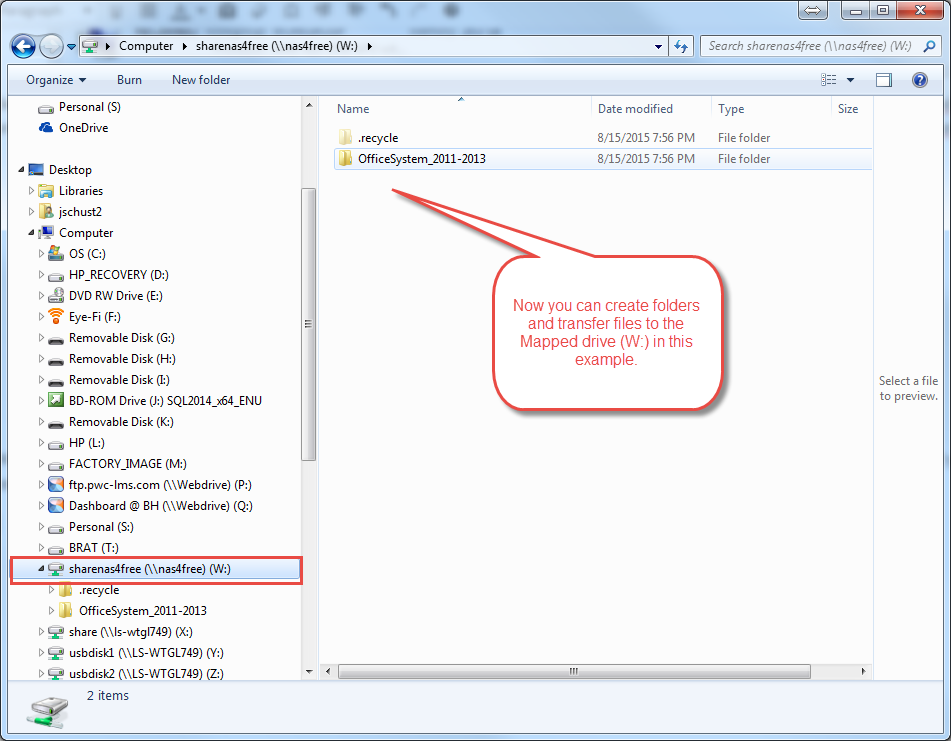
In this example the (W:) drive was mapped to the \\Nas4free server and the (ShareNas4Free) share. Now you use this drive just like any other drive on your windows system.
Part 2: How to copy Blu-ray and DVD to Nas4Free NAS?
Step 1: To copy Blu-ray and DVD to Nas4Free NAS, you need a DVD and Blu-ray Copy software. You can google Blu-ray and DVD Copy software to find you wanted one. Many reviews online will recommend you manu excellent software. To me, I prefer Pavtube BDMagic.
This Blu-ray and DVD backup software can 1:1 entire copy Blu-ray and DVD discs to video folders to store on Nas4Free NAS. In this way, you will get lossless Blu-ray backups and DVD copies with best audio & video quality, without losing Meta info like audio tracks, subtitle streams, chapter markers, etc in the original discs. If you don't need the extra, you can choose to copy the main title of Blu-ray and DVD discs. But considering the video playback methods, I think that it is the best way to convert Blu-ray and DVD to digital files such as MP4, MKV, WMV, AVI, etc so that you can play Blu-ray and DVD movies via Nas4Free NAS on many devices. You can download this disc backup tool from the button below.
Step 2: After downloaded and installed the Blu-ray and DVD to Nas4Free NAS copying software, you can click “Load from disc” icon to load your Blu-ray and DVD movies. You can also import movies files from Blu-ray folder, ISO and DVD folder and DVD ISO/IFO.
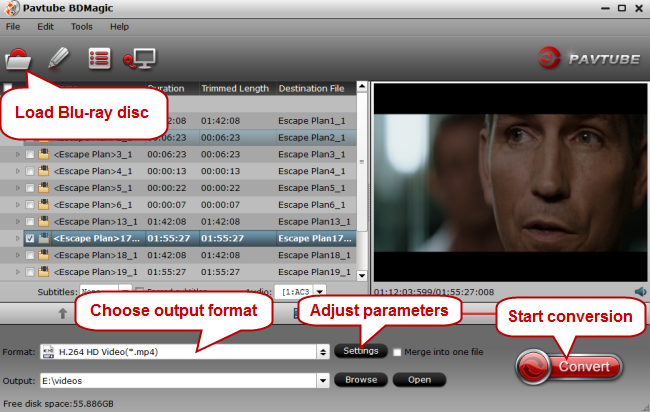
Step 3: Here, you have three options to copy Blu-ray and DVD to Nas4Free NAS.
Option 1- Full disc copy Blu-ray and DVD to Nas4Free NAS.
Make a full disc copy by hitting the  icon on the top tool bar of the main interface. You can find the full Blu-ray and DVD backup folder in the destination folder by pressing the “Open output folder” tab in “Conversion” window or the “Open” button in main screen. The decrypted Blu-ray folder contains all information and contents in the original Blu-ray disc, divided into a BDMV folder and a CERTIFICATE folder and DVD video will be in a Video-TS folder.
Option 2 - Main movie copy Blu-ray and DVD to Nas4Free NAS.
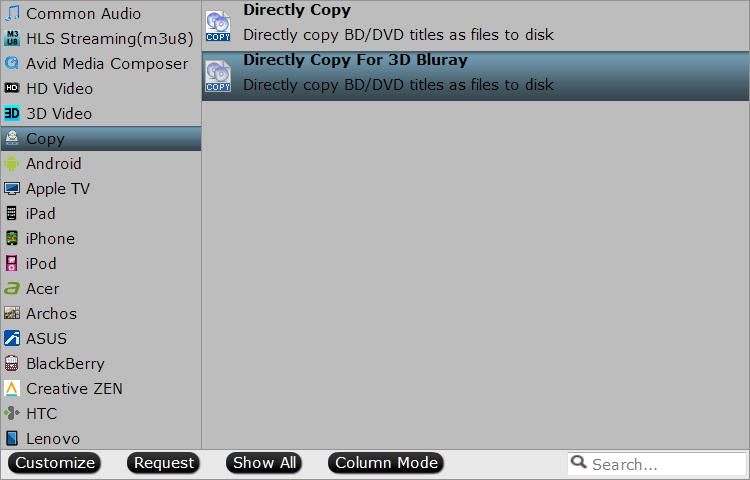
From "Format" bar, select "Copy" > "Direct Copy" to copy the main movie of the Blu-ray/DVD disc.
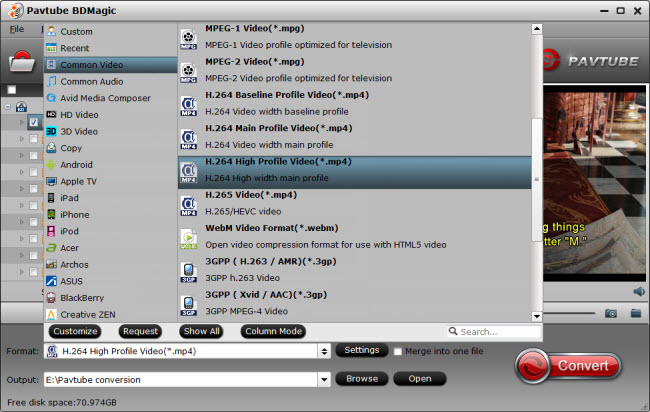
Option 3 - Convert DVD and Blu-ray to digital files for Nas4Free NAS.
Click "Format" bar to select "Common Video" > "H.264 High Profile Video(*.mp4)" or other popular formats as output formats which is the most compatible file format which works on iPhone, iPad, Apple TV, Android phone/tablets and Windows phone and tablets, etc.
In the video setting window (click “Settings” button), you can change the output file resolution, bitrate, sample rate, etc. And if you rip Blu-ray and DVD to H.264/H.265 codec, BDMagic can offer you 30x times Blu-ray and DVD ripping speed when your computer is geared up a CUDA-enabled GPU with NVIDIA CUDA acceleration.
Step 4: After finishing all the settings, go back to the main interface, press the right-bottom "Convert" button to start Blu-ray and DVD to Nas4Free NAS conversion. When the conversion is completed, click "Open output folder", a window will pop out with all your converted files.
Done it now! You can upload the Blu-ray and DVD backups to Nas4Free NAS media pool so that you can view your Blu-ray and DVD movies at home anytime without needing the heavy Blu-ray and DVD player.


