Message lost after iOS 9 installing
"I am asking help to recover my iPhone text messages. I installed iOS 9 on my iPhone 6 Plus and all my messages are gone. I want to get the text message and they are very important for me. Do you have any method to help me to regain text message for my iPhone device.thank you!"

Although iOS 9 has brought many new features such as new Notes apps, Multitasking, etc for iPhone users, however, most people complain that their important text messages get lost after installing this new iOS operating system. Generally speaking, it is very common to suffer data loss when initiating a new iOS update. Therefore, it is very essential to make a full preparation before performing iOS 9 update on your iPhone and one of the best way is to backup your iPhone data to iTunes or iCloud account.
Sometimes, the precious data may still get lost even we have made a full backup. Fortunately, there are many Mac iPhone Data Recovery tools to help you to take the load of the pressure caused by data loss disaster. One of the highly appreciated application is called iOS Data Recovery (Best 5 iPhone Data Recovery), which facilitates you to recover deleted or lost text message for iPhone in three different models: recover directly from iPhone, restore from iTunes backup file or retrieve from iCloud backup file. The program has perfect support for all the latest and old iPhone models including iPhone 6 Plus/6/5S/5C/5/4S/4/3GS.
Besides contacts, you can also effortlessly get back other text data such as Contacts, Notes, Reminder, Call History, Calendar, Whatsapp History, Safari Bookmark, FB Messenger or media data like Camera Roll, Photo Stream, Voicemail, Voice Memo, Photo Library, App photos, App Videos, App Documents for your iPhone with this remarkable iPhone Data Recovery tool.
The following article will show you the detailed steps to recover iPhone deleted messages in three different ways:
Restore from iTunes backup file
Retrieve from iCloud backup file
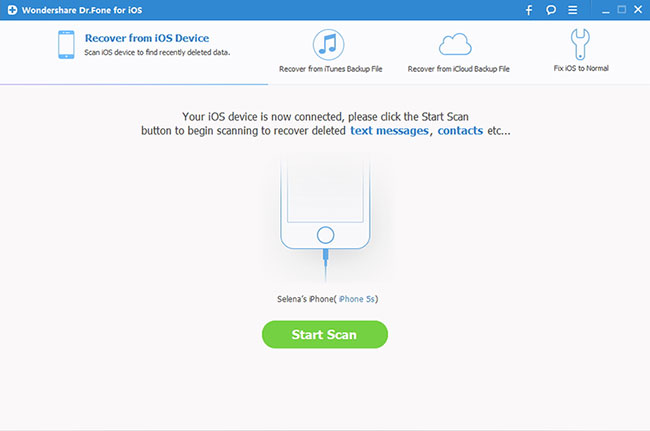
Step 1: Run the program, connect your iOS device to the computer.
Install and run iOS Data Recovery on your computer, then connect your device to the computer through its equipped USB cable. The program will detect your iOS devices automatically and shows you the window for "Recover from iOS Device".
Tips: Before run the application, make sure you have downloaded the latest version of iTunes. To avoid automatically syncing, don't launch iTunes when running iOS Data Recovery. Here, you are advised to disable the automatically syncing in iTunes beforehand: Launch iTunes > Preference > Device, check "Prevent iPods, iPhones and iPads from syncing automatically".
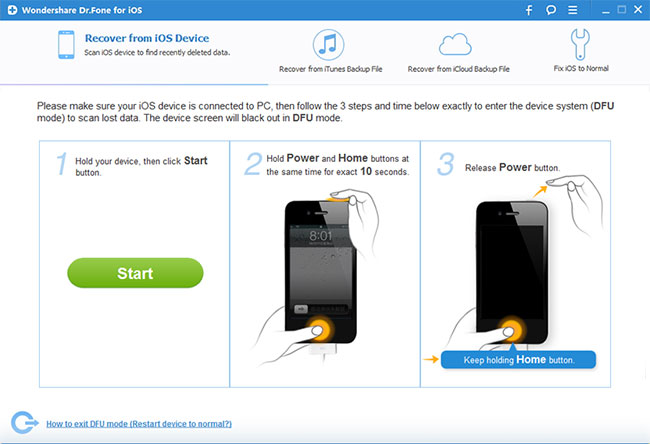
If your iOS device is iPhone 4, iPhone 3GS, iPad 1 or iPod touch 4, you can switch to the "Advanced Mode" through the button at the lower-right corner. After then follow the instruction in the window to enter device scanning mode: Hold your device, then click the Start button > Hold the Power and Home buttons at the same time for exactly 10 seconds > Release the Power button but keep the Home button pressed.
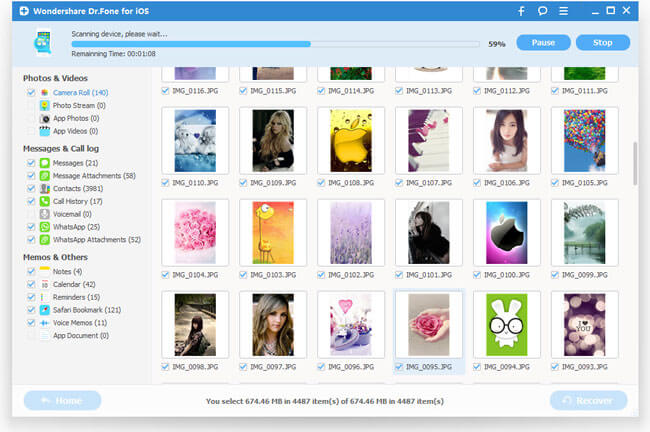
Step 2. Scan Your Device for Lost Data on it.
Tap the "Start Scan" button, the program will start to scan your iPhone, iPad or iPod touch to find for deleted or lost data. It will take a few minutes for the scanning process to be completed. During the scanning process, if you find the data you are looking for to recover, you can click the "Pause" button to stop the process.
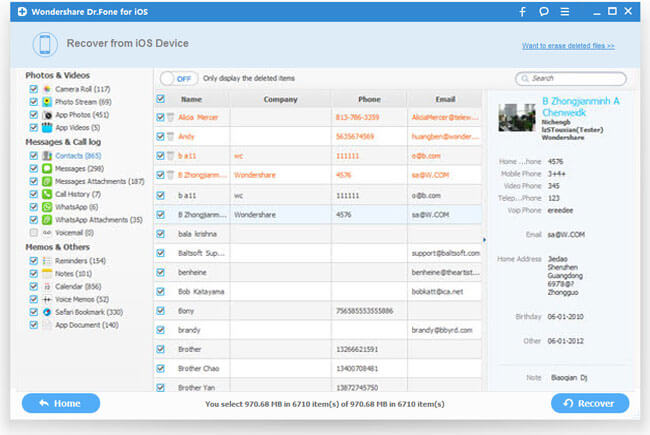
Step 3. Preview the Scanned Data
When the scanning process is over, a scan result with both lost and existing Data on your device will be displayed in categories. To filter out the deleted data on your iOS device, you can turn on the option "Only display the deleted items". You can preview the found data on its file type by clicking the file type in the left side. You can also search for a specific file by typing a keyword in the search box on the top right of the window.
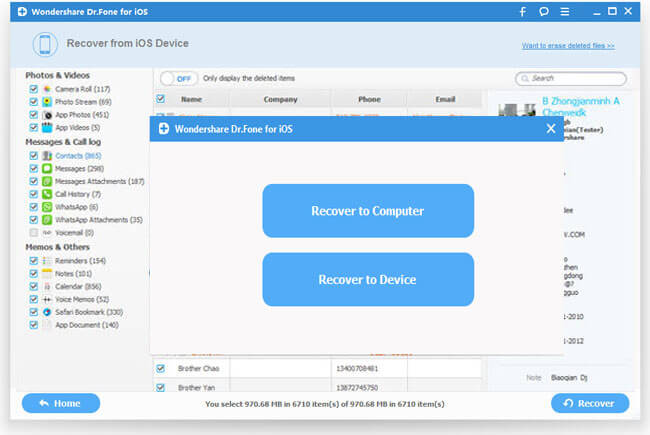
Step 4: Recover Data from your iPhone/iPad/iPod touch.
When you find the data you need, select them by putting a check mark in front of the box. After that, hit the "Recover" button at the bottom right of the window. And the recovered data will be saved to your computer by default. As for text messages, iMessage, contacts, or notes, when you click Recover, a window will pop-up to ask you to "Recover to Computer" or "Recover to Device". If you want to put these messages back to your iOS device, click "Recover to Device".
Restore from iTunes backup file
Step 1. Choose Recovery Mode.
Launch iOS Data Recovery and click to select "Recover from iTunes Backup File" option. After then, the program will start to detect all iTunes backup files on this computer and display them in the window. You can confirm which one is the one you need according to the date it has been created.
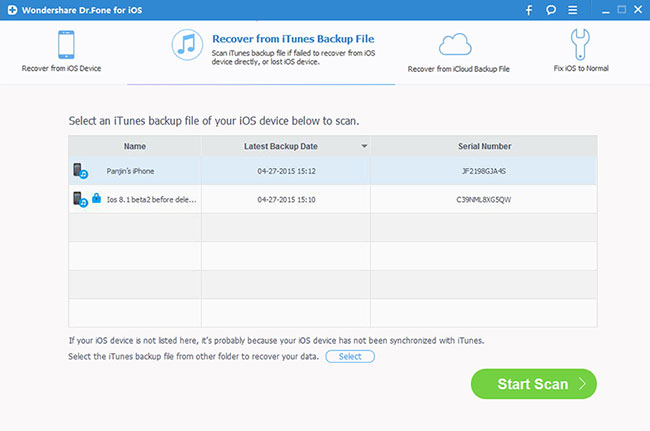
Step 2. Scan Data from iTunes Backup File
Choose the iTunes backup file that contains the data you want to recover and click "Start Scan". It will take a few minutes to extract all data from the iTunes backup file.
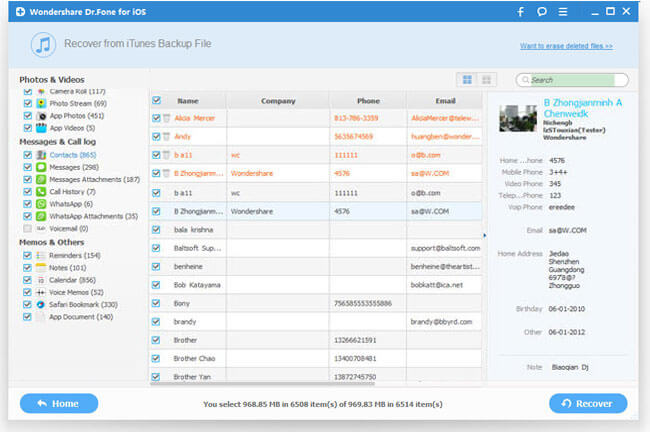
Step 3. Preview and Recover Data from iTunes Backup
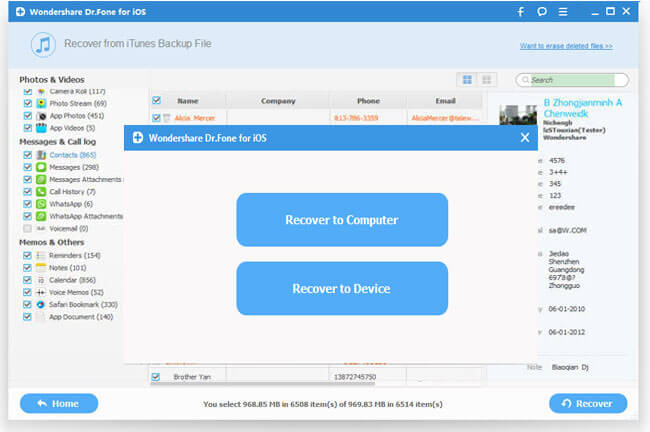
After a few seconds, all data in the iTunes backup file will be extracted and displayed in categories. You can preview them one by one before recovery. Then you can selectively mark and recover those you want by pressing the "Recover" button at the bottom. You can directly recover contacts, notes and messages to your iOS device if you have kept your iOS device connected with your computer via a USB cable during the recovery process.
Tips: you can use the search box in the top right of the result window to search for a file by typing the name.
Tips:
The location of this folder varies depending on your operating system. For Windows Vista 7,8 and 10 users, you can find device backups in \Users\(username)\AppData\Roaming\Apple Computer\MobileSync\Backup\. While for Windows XP users, the list of your iTunes backups are under: \Documents and Settings\(username)\Application Data\Apple Computer\MobileSync\Backup\
Retrieve from iCloud backup file
Step 1. Choose Recovery Mode
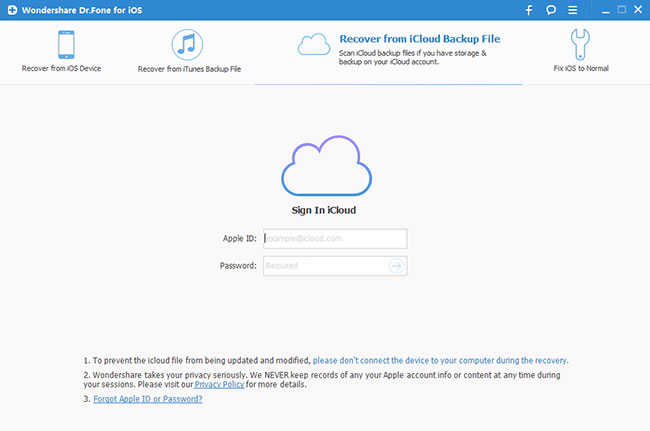
After running iOS Data Recovery, choose the recovery mode of "Recover from iCloud Backup Files" on the top. Then you'll see the window below. Enter your iCloud account and password to login. The program takes your privacy seriously. We never keep a record of any your Apple account info or content at any time during your sessions.
Step 2. Download iCloud Backup File
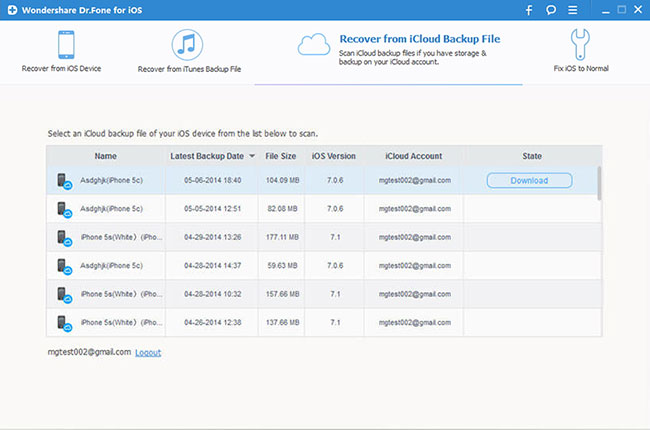
When you logged into iCloud, the program can find all iCloud backup files in your account. Choose the one where you're going to recover data and click on the "Download" button.
And then in the pop-up, you can choose the type of files you would like to download. This will reduce the time of downloading the iCloud backup file. After that, you can scan the iCloud content now. Click on the "Scan" button to begin. It will take you some time. Just wait for a moment.

Step 3. Preview and Recover Data from iCloud Backup File
The scan will be complete in a few minutes. Once it stops, you can preview almost all data in your iCloud backup file, like contacts, messages, photos, and more. Check them one by one and tick the item you want. Then click on the "Recover button" to save them on your computer with one click.
Now contacts, messages and notes can be directly recovered to your iOS device if your iPhone, iPad or iPod touch is connected with your computer with a USB cable during the recovery process.

Tips:
Restoring your iDevice from an iCloud backup is not recommended, because your iPhone or iPad will restore to the moment it was backed up last. You will LOSE all the data created between the moment your iPhone was last updated to iCloud and the moment you will restore your iDevice. This could result in losing other valuable data, which can never be restored or recovered.


