As the best Plex Media Server Alternative, the free and open source cross-platform software media player Kodi, acting like a central Hub for you to collect and organize all your movies, music and television shows in one location to watching on any devices you like. If you are a newbie for Kodi, you have come to the right place, this article will offer some useful tips and solutions about Kodi in two parts:
Part 1: What are the file formats supported by Kodi
Part 2: How to install and setup Kodi on Windows

Part 1: What are the file formats supported by Kodi
Before adding local videos or movie to Kodi for playback, make sure that the video, audio for containers are included in Kodi supported formats list as below:
Container formats: AVI, MPEG, WMV, ASF, FLV, MKV/MKA (Matroska), QuickTime, MP4, M4A, AAC, Ogg, OGM, RealMedia RAM/RM/RV/RA/RMVB, 3gp
Video formats: MPEG-1, MPEG-2, H.263, MPEG-4 SP and ASP, MPEG-4 AVC (H.264), H.265 (as from Kodi 14) HuffYUV, MJPEG, RealVideo, RMVB, WMV
Audio formats: MIDI, AIFF, WAV/WAVE, AIFF, MP2, MP3, AAC, DTS, ALAC, AMR, FLAC, RealAudio, WMA
3D video formats: Passive 3D video formats such as SBS, TAB, anaglyph or interlaced
Part 2: Install and setup Kodi on Windows PC
Download Kodi on Windows
Windows is one of the easiest operating systems to install Kodi on. Go to the downloads page and download the build that is compatible with your operating system.
Install Kodi on Windows
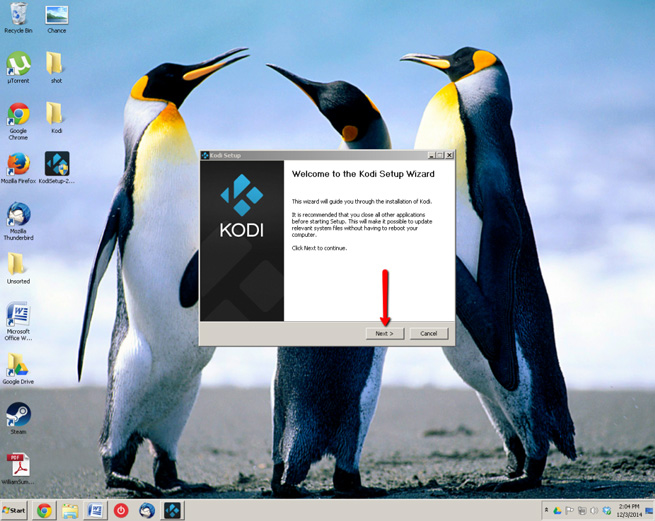
Double click the Kodi Setup icon on your desktop, then you’ll see the Setup Wizard pop out,click next.
After that, you will see the Terms and Conditions. Click I agree.
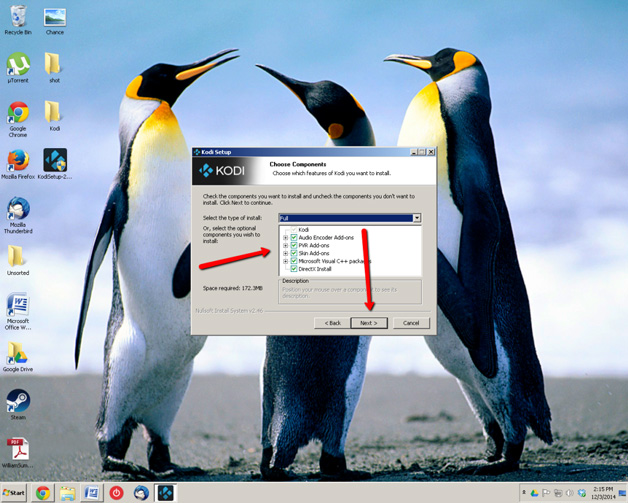
At this point Kodi is going to ask you if you want to install some additional programs like DirectX and some audio encoders. Unlike most programs where they try to install junk, these programs will actually improve your Kodi experience; so I would recommend keeping them. If you don’t want them, just click the little box next to their name. Once you are done click Next:
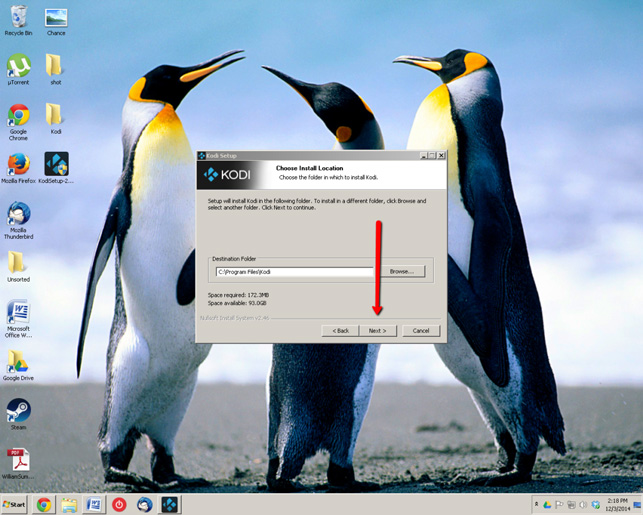
Then it’s going to ask you where you want to install Kodi. The default location is usually C:\ Program Files\ Kodi. You can change it if you like, but I prefer keeping things simple so for this guide, we’ll leave it at the default location. Click Next when you’re done.
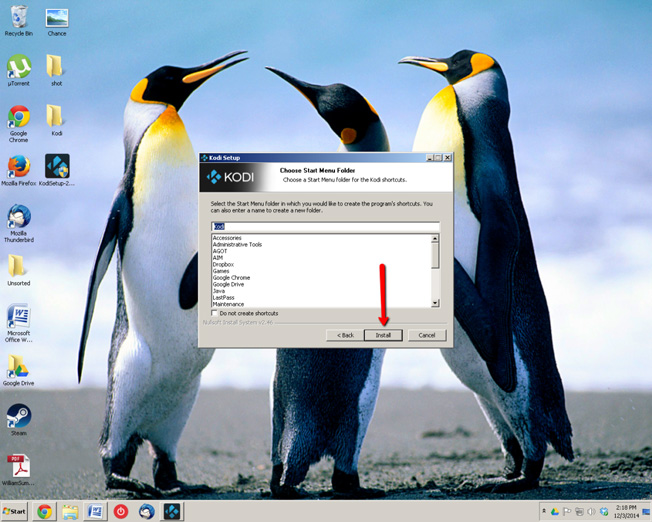
Next it’s going to ask you what you want the start menu folder to be named. Leave it as Kodi and click Install.
Now we wait…
When the installation gets to the end, it will stay on this screen for a few minutes. Don’t worry, it hasn’t frozen.
Success! Kodi has been installed. At this point you have the option of running Kodi or just closing out the screen. The choice is yours. Either way, click Finish when you’re ready.

Setup Kodi
Once Kodi is installed, the next part is the setup process. Because Kodi is open-source and meant to be tinkered with, there are many different ways to configure Kodi. I’m going to walk you through how to set up Kodi in the simplest way I know how.
For the purposes of this guide, I’m going to add the one of the movies to my Kodi Library. Bear in mind that what I am about to show you will work for Music as well as Images.
On the home page, find the Videos tab and select Files:

Next click Add Videos link / button:

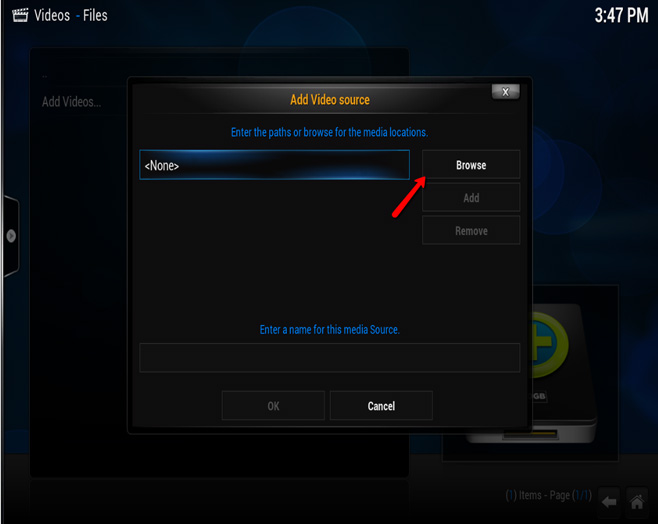
Next it’s going to ask you to add a source. They’re basically asking you to add the folder that the media will be in. Click Browse:
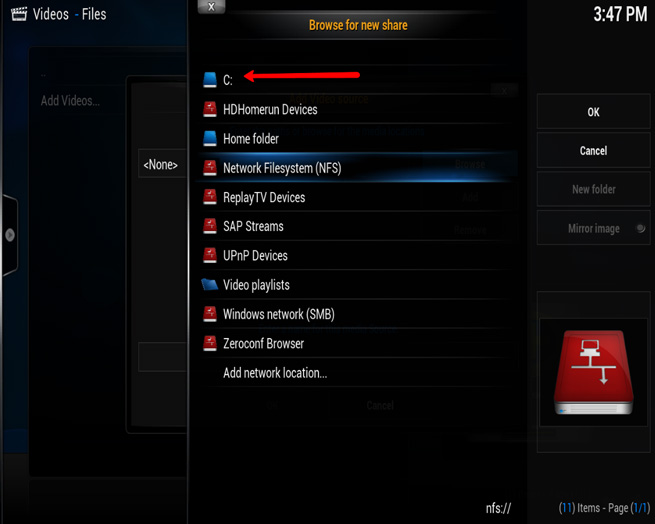
Next it’s going to ask you to locate the file folder. Click C: to start browsing through your computer:
Locate file folder
Once you find your folder, select it and click OK:
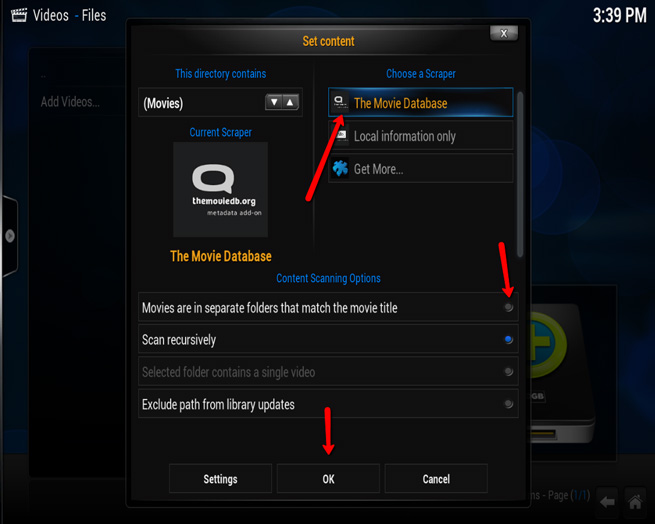
Next Kodi will ask you what kind of content you’re adding.

For this exercise I will pick Movies. You don’t have to click any of the options on the bottom, but I would click Scan Recursively so if you add any other content Kodi can scan it. Once you are done click OK:
Congratulations, your movie is now in your digital library!
Now don’t worry, Kodi will do this for every movie in your folder; so if you have hundreds of videos everything will be added and tagged automatically.
Further Reading:
A Hassle Free Guide to Install Kodi on Android TV
How to Install Kodi on Amazon Fire TV?
Stream Video from Kodi/XBMC to Chromecast
Use QNAP NAS on TV Via HD Station and Kodi Application
Essential Add-ons that you must download for Kodi