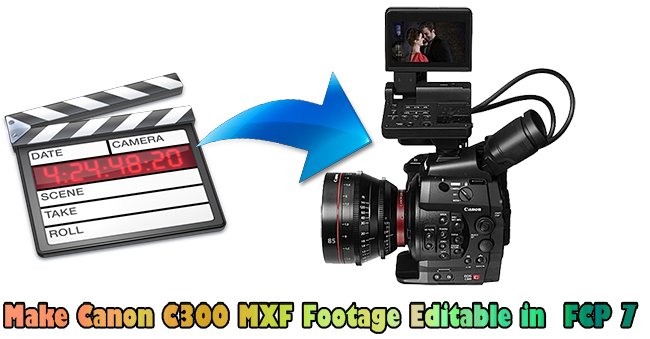
Canon C300 generated MXF footage. However, it seems that the MXF files are quite unfriendly to Final Cut Pro 7. Even the Canon XF plug-in and Log & Transfer function sometimes fail to enable editors to work with Canon MXF files in FCP 7 natively.
Don’t leave your FCP 7 there useless, and go outside for an solution to ingest Canon MXF footage to FCP 7. Pavtube iMixMXF(best Mac MXF Converter Review), the perfect Canon MXF to FCP 7 converter solution has the great capability of encoding Canon C300 MXF footage to Apple ProRes MOV format to make your world of editing easier and more effective as well.
How to ingest Canon C300 MXF footage to FCP 7?
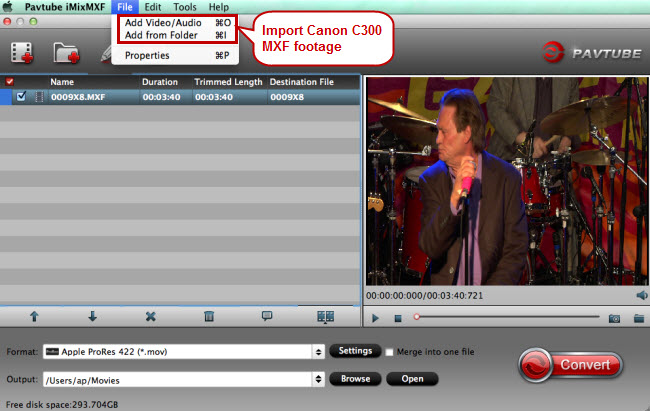
Step 1. Add Canon C300 MXF recordings
Run Mac MXF to FCP converter, and click on “File” to import the recorded MXF footage by your Canon C300 camera. MXF footage shot by a Sony XDCAM camcorder or a Canon C500 4K camera can also be imported to this MXF to FCP ripper for conversion.
Step 2. Select Apple ProRes 422 MOV for FCP 7
Follow “Final Cut Pro” > “Apple ProRes 422 (*.mov)” after clicking the format bar. To preserve multiple audio tracks, the “Multi-track Video” option will be great.
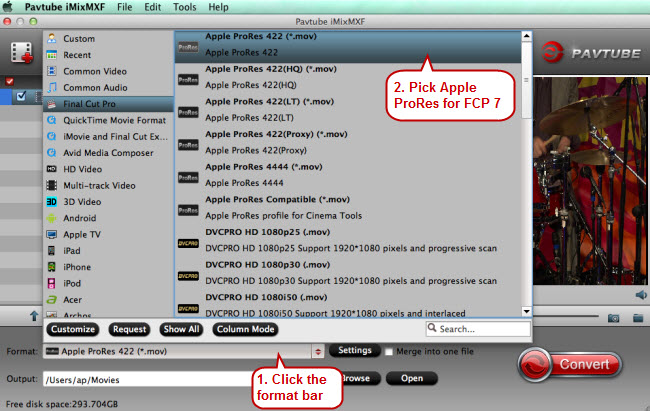
Tips: If your Canon C300 records video footage with multiple audio tracks using different microphones, it is idea for you to select “Multi-track Video” > “Multi-track Apple Prores 422(*.mov)” as your target output format to preserve all the original audio tracks in an MOV container.
Step 3. Edit Canon C300 MXF files (Optional)
Want to cut the useful clips from Canon C300 MXF footage? Try “Trim” function. Adjust aspect ratio by in “Crop” tab. Other editing functions like adding watermark, adjusting video effect and audios can also be helpful a lot for you.
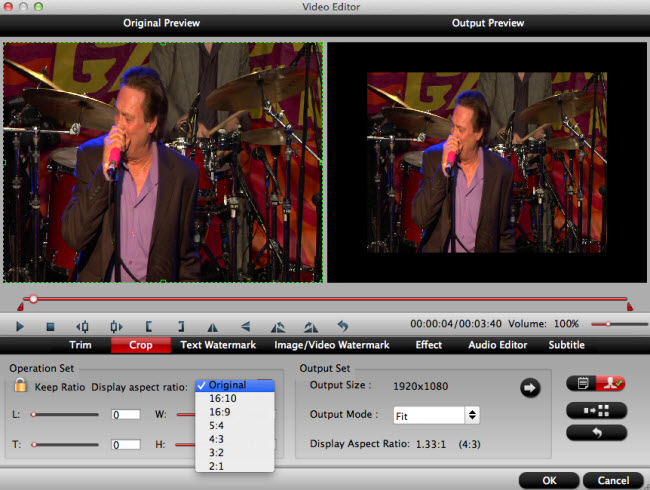
Tips: If you choose multi-track as output formats, you will not be able to perform the video editing functions. However, you are still enabled to set the output video/audio profile settings after you choose the multi-track format form “Format” drop-down list.
Step 4. Get down to MXF to FCP 7 conversion
The last step is quite easy. Just click “Convert” to enable conversion from AVCHD MXF to Apple ProRes. When the screen indicating conversion status appears, it will tell you how long it will last for the whole MXF conversion.


