"Hi guys, I just updated to iOS 9 a few hours ago and I've noticed most of my photos are missing from my phone and my iCloud. In fact, my iCloud drive shows no files at all! However, when i look at the storage levels, it says i have 14gb worth of photos, but the drive is completely empty and not showing any files at all! I'm trying to restore from a backup from my computer, but it says my last backup was in May! What the problem? i back up almost every night! Anyone have any idea how to retrieve my lost data? I have an iphone 5s. HELP!!"

When the iOS 9 released, many people can't wait to upgrade their iPhone/iPad to this new operating system for more convenience and lots of new functions. Before performing the upgrading process, it is essential for you to make a backup of your iPhone/iPad to prevent unexpected data loss problems during iOS 9 upgrading. However, even if you have made a full preparation, you may still suffer data loss after iOS update.
When getting stuck in that condition, don't be panic though, the first thing is stopping using the device which has lost important data, then find a reliable data recovery tool to get your lost data back immediately. iOS Data Recovery(Top 5 iPhone Data Recovery for Windows 10) is a standalone and simple-to-use tool which facilitates you to comprehensively recover deleted or lost iPhone/iPad contacts, messages, photos, videos, notes, calendar, etc after iOS 9 update. The program supports 3 different recovery mode: Recover directly from iPhone/iPad, restore from iTunes backup file and retrieve from iCloud backup file. For Mac users, please go to download iOS Data Recovery for Mac to fix data loss problems after iOS 9 upgrading on Mac OS X.
The following guide will mainly focused on the detailed steps to recover lost data from iOS devices after iOS 9 update
Step 1: Run the program, connect your iOS device to the computer.
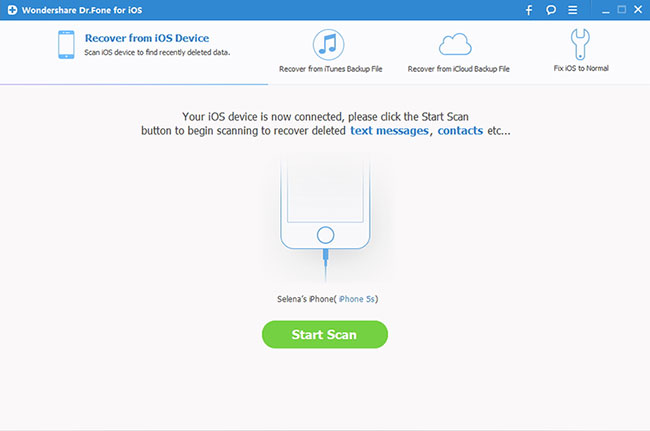
Install and run iOS Data Recovery on your computer, then connect your device to the computer through its equipped USB cable. The program will detect your iOS devices automatically and shows you the window for "Recover from iOS Device".
Tips: Before run the application, make sure you have downloaded the latest version of iTunes. To avoid automatically syncing, don't launch iTunes when running iOS Data Recovery. Here, you are advised to disable the automatically syncing in iTunes beforehand: Launch iTunes > Preference > Device, check "Prevent iPods, iPhones and iPads from syncing automatically".
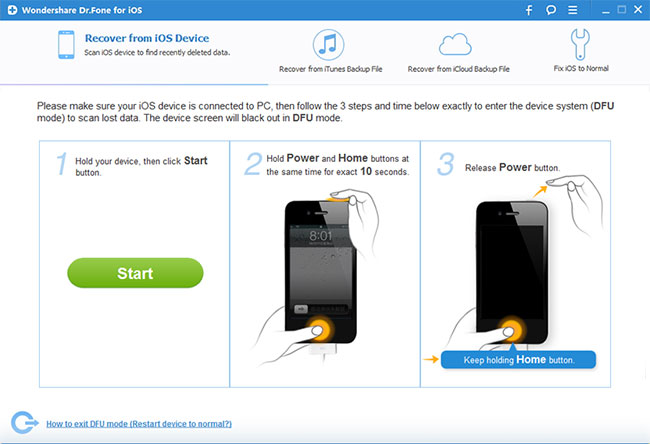
If your iOS device is iPhone 4, iPhone 3GS, iPad 1 or iPod touch 4, you can switch to the "Advanced Mode" through the button at the lower-right corner. After then follow the instruction in the window to enter device scanning mode: Hold your device, then click the Start button > Hold the Power and Home buttons at the same time for exactly 10 seconds > Release the Power button but keep the Home button pressed.
Step 2. Scan Your Device for Lost Data on it.
Tap the "Start Scan" button, the program will start to scan your iPhone, iPad or iPod touch to find for deleted or lost data. It will take a few minutes for the scanning process to be completed. During the scanning process, if you find the data you are looking for to recover, you can click the "Pause" button to stop the process.

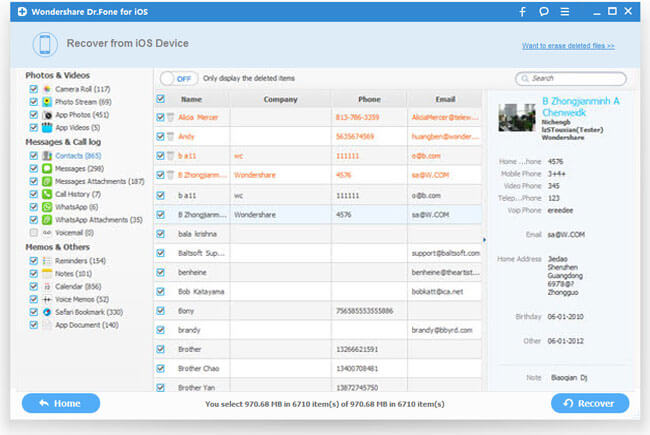
Step 3. Preview the Scanned Data
When the scanning process is over, a scan result with both lost and existing Data on your device will be displayed in categories. To filter out the deleted data on your iOS device, you can turn on the option "Only display the deleted items". You can preview the found data on its file type by clicking the file type in the left side. You can also search for a specific file by typing a keyword in the search box on the top right of the window.
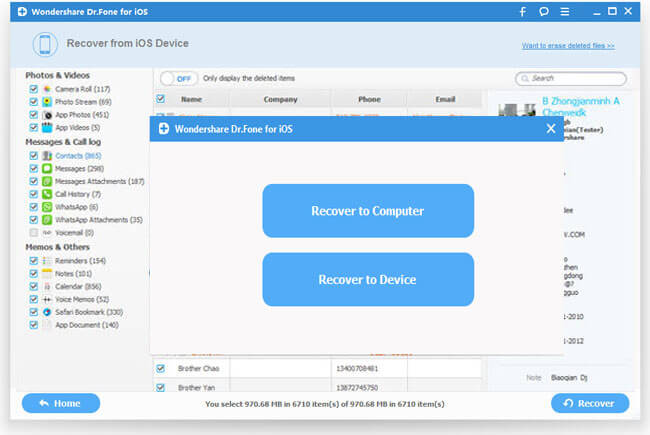
Step 4: Recover Data from your iPhone/iPad/iPod touch.
When you find the data you need, select them by putting a check mark in front of the box. After that, hit the "Recover" button at the bottom right of the window. And the recovered data will be saved to your computer by default. As for text messages, iMessage, contacts, or notes, when you click Recover, a window will pop-up to ask you to "Recover to Computer" or "Recover to Device". If you want to put these messages back to your iOS device, click "Recover to Device".