You can use a Raspberry Pi (3/2/1) as a mini desktop computer for watching video with XBMC/Kod. Raspberry Pi is a good choice for a video and music player computer because it is cheaper than most TV devices like a DVD Player. It makes no noise since there are no moving cooling fans needed to cool its CPU, and other parts on the Pi 2. The Pi 2 also won’t heat up your room like some computers which generate lots of heat from the CPU, RAM, and video card when turned on, and playing HD video. You can add your video files onto a NAS then stream the media on TV via Raspberry Pi with Kodi. If you have some DVD discs, you also can rip and play DVD on Raspberry Pi based media center.
You can connect a physical DVD drive to stream the video direct from DVD disk. But it will be better to rip and put DVD to NAS for Raspberry Pi based media center use. You can use a DVD Ripper to decrypt DVD discs and convert DVD to Raspberry Pi media players supported MP4, MKV, MOV, WMV, etc video.
Best Tool to Rip DVD to Raspberry Pi 3/2/1
Pavtube ByteCopy will be the best DVD ripping tool to help users to remove DVD copy protection like UOP, CSS, Region Codes and extract DVD main title to save as Raspberry Pi media player supported MP4, MKV, AVI, MOV, etc with lossless quality. Like other DVD ripping tools, it can output hundreds of video and audio formats including 3D video and 4K video formats. Unlike other software, ByteCopy also can rip DVD to uncompressed MKV keeping multiple subtitle and audio tracks as well as chapter markers with lossless image and sound quality. It also can convert DVD to MP4/MOV/AVI for Raspberry Pi 3/2/1 streaming with multiple audio tracks.
In addition, you can configure the video and audio encoder, bitrate, sample rate, frame rate, channel to make the exported video more compatible with Raspberry Pi (3/2/1) media player. The interface of this Pavtube DVD Ripper is what makes the DVD to Raspberry Pi workflow very easy to use because in case you don't want to waste your time with fancy configuration screens, you just have to pick the DVD sourc, choose the export format and hit the 'Convertt' button. Now, you can download a trial version software to try to convert DVD to Raspberry Pi (3/2/1).
Steps to Convert DVD to Raspberry Pi 3/2/1 Based Media Center
Step 1: Import DVD image file
Run the DVD to Raspberry Pi converter on your computer. Click “File” > “Load from Disc” to add DVD discsto this software. Besides DVD, ByteCopy also can rip Blu-ray disc to Raspberry Pi (3/2/1) so that you also load Blu-ray discs here to enable Raspberry Pi playing Blu-ray movies. You can select the desired subtitle and audio tracks at the chapter list. You also can choose to rip DVD with forced subtitles to unshow the subtitles when the characters saying the mother tongue.

Step 2: Choose Format for Raspberry Pi
Kodi supported various video fromats. Raspberry Pi decodes 1080p H.264 HD video smoothly. So here, you are suggested to click "Format" > "HD Video" > "H.264 HD Video(*.mp4)". You are also allowed to set up profile parameters under Profile Settings to get better video and audio playback on your portable devices. You can adjust video resolution, video and audio bitrate, frame rate, etc.

Step 3. Start DVD to Raspberry Pi conversion
When you finish subtitle settings in each solution, click “Browse” button to select destination folder saving the ripped video, and then click the redr “Convert” button at the bottom of pop-up panel to make the DVD to Raspberry Pi ripping begins. Just in a while, you will see the ripped file in the MP4 format.
Now, you can install Kodi to turn Raspberry Pi 3/2/1 a home media center to stream your DVD videos.
Hardware for Your Raspberry Pi Media Center
You won’t need much to get started with your Kodi + Raspberry Pi media center. But if you’d like to enhance the experience, there are a few things you can add to the basic setup.
Basic Setup
You might already have a Raspberry Pi. Alternatively, you might be about to buy one. At a minimum, you’ll need:
- Raspberry Pi Model B+ or later.
- Optional USB Wi-Fi dongle for pre-Raspberry Pi 3 devices.
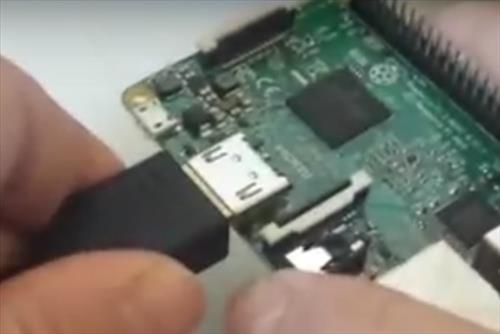
- HDMI cable.
- 2A USB power adaptor, or specific Raspberry Pi power supply.
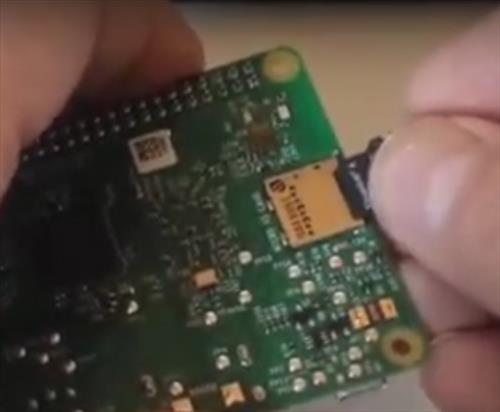
- MicroSD card (8 GB or more recommended).
As long as you have a PC to download your preferred operating system and write to the microSD card, you should be ready to go.
How To Install KODI On a Raspberry Pi 3 Using OpenELEC?
1. A Pre-built Kodi Image file is needed to be written to the SD-Card.
Download OpenELEC Image file here. http://openelec.tv/get-openelec
They keep changing the layout of the download page, simply look for Raspberry Pi2 and Raspberry Pi3 Image files. RasPi 2 Builds work fine on the RasPi 3.
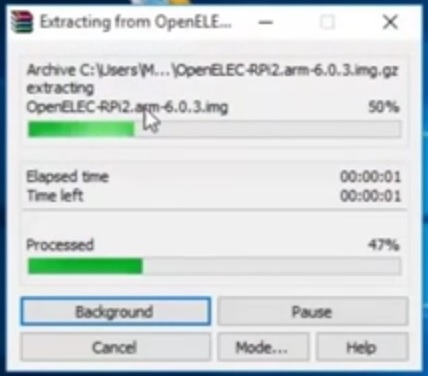
2. After downloading the Image file it needs to be extracted. The file will be in a .GZ file format.
A Window based computer does not come with a built-in way to extract a.GZ file.
WinRAR or similar is needed to extract the file.
WinRAR can be downloaded here. http://www.rarlab.com/download.htm
3. Once the file is unzipped than it is ready to be written to the SD-Card.
I use Win32 Disk Imager to write files if you already have Image writing software then use it.
Here is the download to Win32 Disk Imager.https://sourceforge.net/projects/win32diskimager/
Insert your SD-Card into a SD-Card writer slot and open Win32 Disk Imager.
Click the folder icon and point it to were the OpenELEC Image file was extracted.
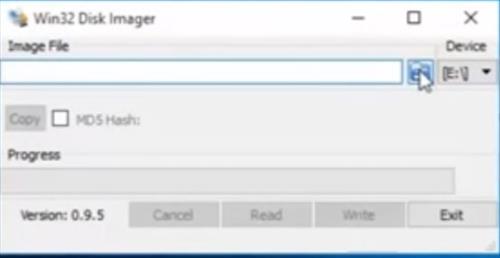
Be sure the correct drive is selected to write as Win32 Disk Imager will write to what ever it is set to!!
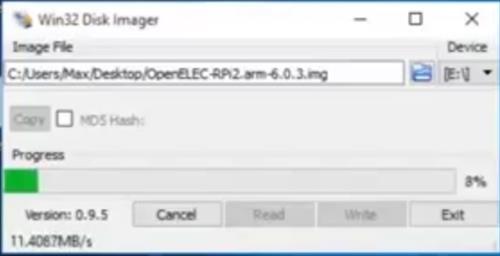
Once everything is set correctly click the write button and Win32 Disk Imager will write the Image file to the SD-Card.
4. Once the Image is written than the SD-card can be inserted into the Pi 3.
5. Plug in all the connections to a TV with a mouse, keyboard or other controller.
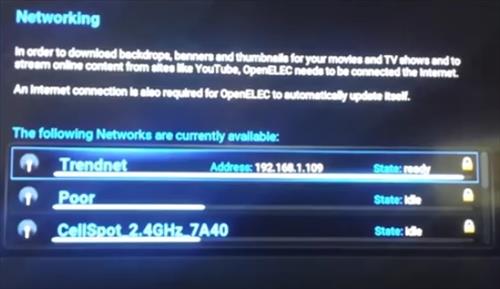
6. The first time it boots the WiFi or Ethernet need to be setup. I used the built-in WiFi with good results. Using a Ethernet connection maybe necessary for those in a crowded wireless environment or far from the router.