Watching videos on TV, smart phones, theatre, iPad, etc is becoming the main entertainment. We prefer to download the video and save it on some storage devices for playback, like the NAS, external hard drive, USB, etc, sometimes, we also like to take the video by the iPhone, camera, DJI drone and share the video on some popular online share websites, like the Youtube, Facebook, Vimeo, etc. When we are enjoying these, video size is the big trouble which can affect you to get the better video playback, uploading, editing, storage, etc.
For example: When you take the video and share on the Youtube, your video length is limited to 15 minutes, in other words, you need to cut the video and reduce the video size, it's too large. Vimeo, Youtube, or other social apps all limit the video size. Compression is necessary if you want to share your videos on the internet smoothly. When you need to compress the video, how do you do? Which video compressor are you doing? We will tell you how to get the desired video size and keep the video quality at the same time.
First: What Affects Your Video Size?
We need to know the video related factors well, then we know how to compress the video. A video file holds many parameters, like the video codec, video frame, video resolution, video bitrate, etc, they all effect the video size, you can adjust them for changing the video size. At the same time, you can't ignore the video quality.
Codec: This is a method that your computer uses to decide on the amount of change that occurs between frames. The word "codec" is a combination of "encoder" and "decoder". It takes the raw video, encodes it into a smaller package, and likewise can unpack and play the video.
Keyframe: The codec will determine a keyframe every few frames. This is the base frame for the next few frames of change. Your keyframe interval will have a large impact on the size of your finished file. Lots of keyframes will make the file larger but higher in quality.
Bit rate (or data rate): This is the amount of data that each second of video will use. Typically, this is measured in kilobits per second. Bit rates can be either Constant or Variable. A constant bit rate stays the same throughout the video, which can lead to larger video files. A variable bit rate changes depending on the amount of action on the screen, which will lead to smaller files.
Tip: Variable bit rates can decrease quality if the bit rate does not change dynamically enough with the video. Experiment with both bit rates to find a balance between size and acceptable quality.
Frame rate: This is the number of frames per second. Videos are typically shot in 24 or 30 frames per second. It's recommended to keep the frame rate the same as the original raw video, otherwise, playback will look choppy and the audio may not sync properly.
Resolution. This is the size of the outputted video. It is measured in pixels, "width" x "height." Some common resolutions are:
- 854 x 480 (Full Wide Video Graphics Array, "480p")
- 1280 x 720 (High Definition, "720p")
- 1920 x 1080 (Full High Definition, "1080p")
- 3840 x 2160 (4K Ultra High Definition, "4K")
- 4096 x 2304 (Full 4K Ultra High Definition)
Second: Free Video Compressor for Compressing Video
We all want to get the best video compressor which is free and easy to do, no doubt, you can own the Handbrake which is your best option. This software works on Windows, Mac and Linux, which is a free and Open Source, you can get the MP4 and MKV video format. When you download this software, we will teach you to compress the video quickly.
1. Launch Handbrake. Do not be put off by all the buttons and options available.

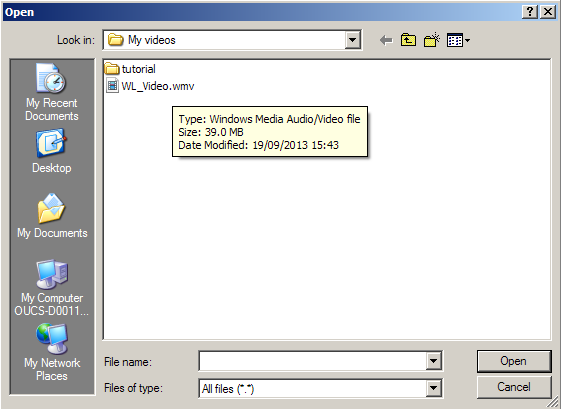
2. Click Source > Open File to select the video you want to compress. In this tutorial, I select WL_Video.wmv and then click Open.
3. In Handbrake, under Destination you can decide where the compressed file is saved by clicking Browse. By default, it is saved in the same folder where the original file is. In addition, you also need to provide a name for the compressed file.
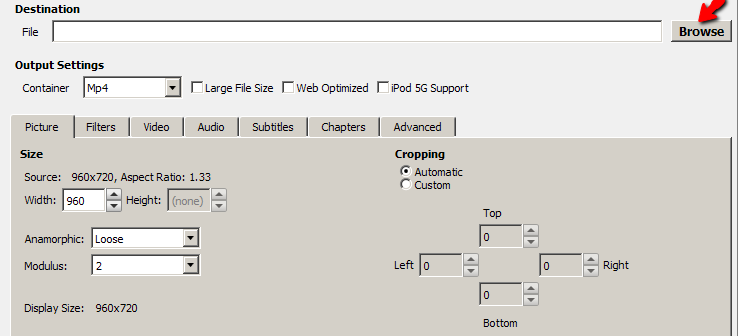
Tip: If necessary, you can change to other location.
4. For Output Settings, choose Mp4 if it is not selected and select Web Optimized. (Because the MP4 as it is the most supported video format on the web and other video devices, media players.)

5. Click on Video and make sure that H.264(X264) is selected.
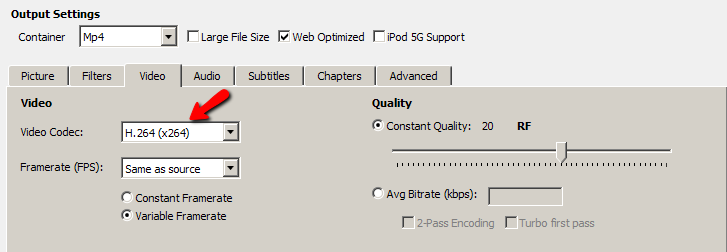
6. Click Start to compress the video. The green Start button will become red Stop button until the compression is done.
We just recommend some basic features, the Handbrake has many more features, you can know more from the below how topics.
Hot Topic: Handbrake Alternatives | Install Libdvdcss on Handbrake | Handbrake supported video formats | Handbrake VS Pavtube | 7 Things You can Do with Handbrake
Finally: Best Video Compressor for Getting the Perfect Video
Handbrake is really free and easy to do, some user are not too satisfied with Handbrake and want to get a more powerful video compressor, Handbrake only can output MP4 and MKV video formats which is not enough. We have found the hero: Best Video Compressor-Pavtube Video Converter Ultimate. You can compress the video and get any video formats you want, like the MP4, MOV, AVI, MKV, H.265, H.264, WMV, etc, 300+ video formats are listed here. You also can compress with various video and audio file formats to almost any video file types. Best of all, this software provides the built-in video editor, you can split the video into some clips, cut or trim the video for smaller video size, you also can enjoy other video editing features, follow the guide and know more.
1. Click "File" drop-down option, then select "Add Video/Audio" or "Add from folder" to select the file you want to compress. If you have several files to compress, this compressor also supports batch compression. You just need to import the folder which holds many video files.
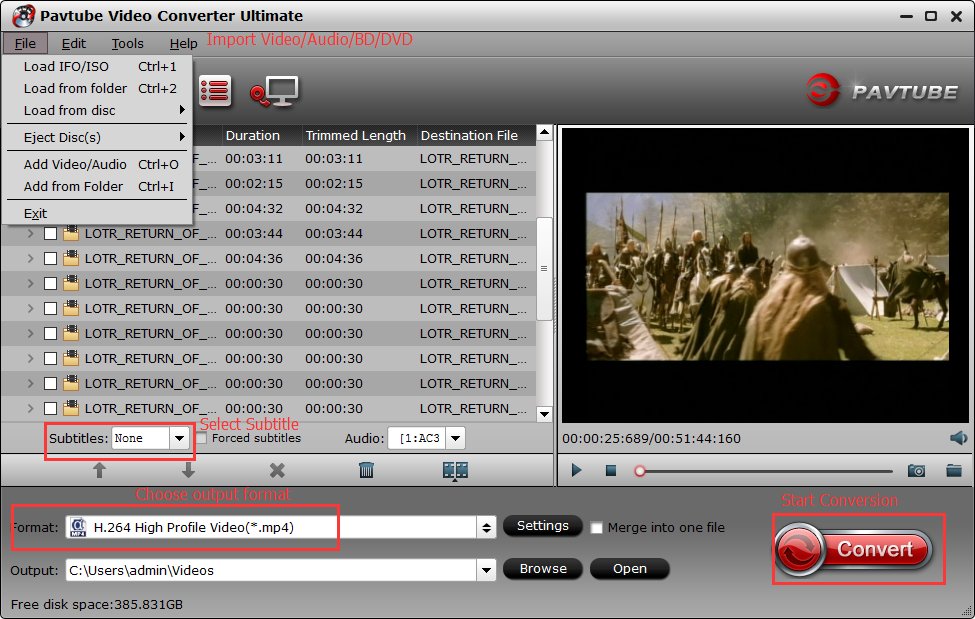
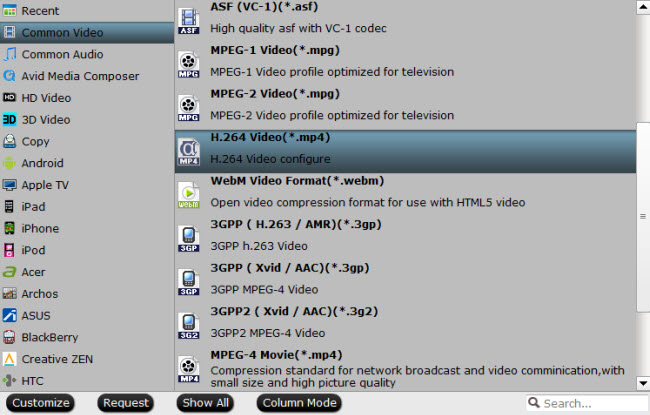
2. Click the Format button, you can choose one video format you want, like the MP4 video which is wide used. Take MP4 as an example. just click on "Format" bar, go to "Common Video", then select "H.264 Video(*.mp4). You also can choose other video formats, like the WMV, MOV, AVI as the output video format.
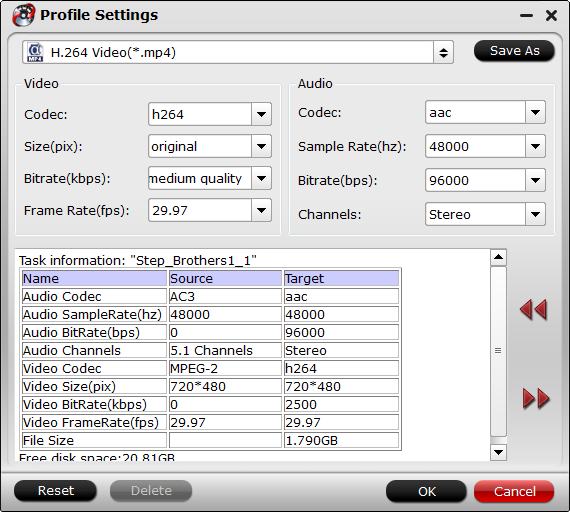
3. If necessary, you can click "Settings" button behind Format bar, to open "Profile Settings" window. Here, you are allowed to adjust various parameters like Resolution, Frame Rate, Bit Rate, etc. You can change output video resolution to 640 x 480, which will largely reduce video size. Or lower the bit rate 20-50% of the default to get small files.
Warning: The lower parameters value will reduce video size. Please note that a proper value is needed to keep good balance between file size and video quality.
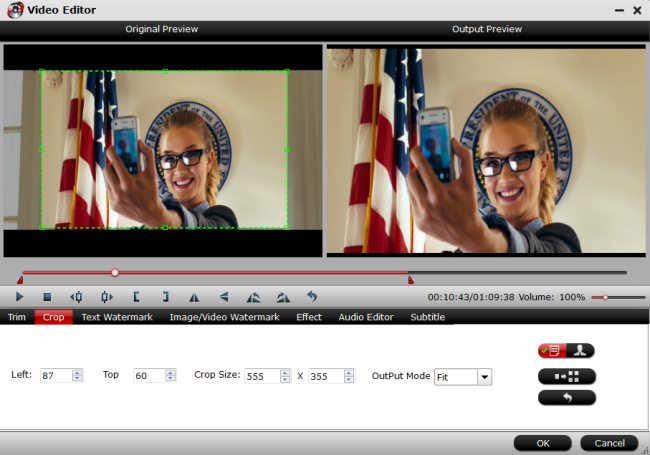
4. You can take full use of the video editor and Trim / Crop / Split video: Click the "Edit" icon on the UI to open "Video Editor" window. What's more, you also can add subtitle to video, add the watermark to video or you can add new music to your video. You can edit the video for better uploading and attracting more viewers.
5. After all the setting are finished, you just need to go back to the main interface and click the Convert button, this software will finish all the tasks you just do.
You can choose any tool you like, we really hope this post is useful for you.


