If you are a Mac user, then you are lucky since you can use the free application offered by Apple, which is the iMovie. It is great for nearly all amateur video editing projects and has all the necessary tools you need to make a great home movie. Nowadays, there are a lot of wonderful videos on YouTube that either keep you roaring with laughter or touch your heart deeply. You might want to import YouTube videos to iMovie for further editing. However, it is important to note that YouTube videos are often in FLV format, which is not recognized by Apple's iMovie. No worry! Here we share an efficient way on how to add YouTube videos to iMovie for editing.
How to Put YouTube Video to iMovie?
As we mentioned above, YouTube FLV video files can't be recognized by iMovie, so the first thing you need to do is to convert YouTube Video to iMovie friendly format. Before the detailed guide on YouTube to iMovie conversion, here is the list of YouTube and iMovie supported formats.
| Supported Video Format | YouTube | iMovie |
MP4 (a multimedia container format standard specified as a part of MPEG-4) |
MPEG-4(.mp4) QuickTime Movie MPEG-2 AVCHD DV&HDV
|
The different video format support lists doesn't mean a failure of importing YouTube video to iMovie, as long as you own an YouTube to iMovie converter such as Pavtube Video Converter for Mac. It is an ideal tool to help you convert downloaded YouTube videos to iMovie compatible files with optimized settings on Mac OS( macOS Sierra, Mac OS X 10.11 El Capitan included). In addition, the software is packed with a large amount of video codecs, it can convert between almost all regular video/audio formats, including MP4, MOV, WMV, AVI, MKV, FLV, 3GP, TS, VOB, etc. (Read the Review)
Besides acting as a YouTube video converter, the program also performs as a video editor, which helps to offer some basic but beneficial video editing functions. You can trim video length to remove unwanted parts from YouTube video, crop video file size, adjust output file aspect ratio, add text/image/video watermark to YouTube video, apply special rendering effect, insert external ASS/SSA/SRT subtitles to YouTube videos, etc. Download it and follow the tips below to get it done easily.
Steps to Convert YouTube Videos to iMovie Compatible Files
Step 1: Import downloaded YouTube videos
Directly drag and drop the YouTube video files to the main interface or click the "Add video" or "Add from folder" icon to load YouTube video files to video converter for Mac. There's also the merge feature, if you have several YouTube video clips, you'd like to combine into a single file, check the "Merge into one file" button.

Step 2: Select output format and specify the destination folder
When the files are loaded, you can simply choose "iMovie and Final Cut Express"> "Apple InterMediate Codec (AIC) (*.mov)" as the output video format, in this option all the key specs like video resolution, frame rate, bitrate has been optimized for using in iMovie. Then hit "Browse" to decide where to locate the output files. Otherwise, they will be exported to a default folder specified by the application itself.

Step 3: Advanced Settings (optional)
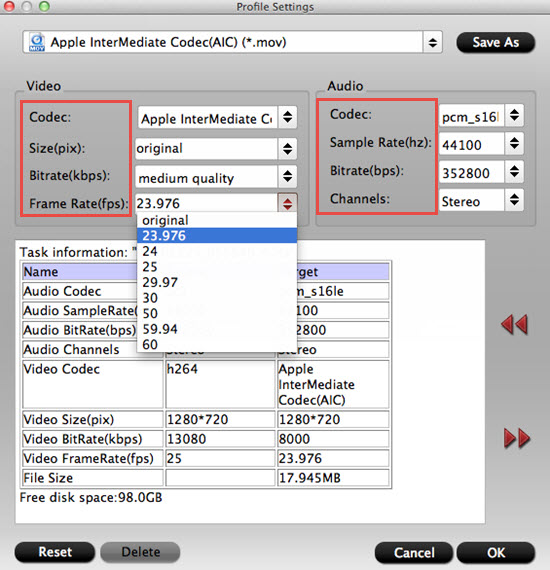
If you are not satisfied with the default settings, click "Settings" button, then you will enter the following interface, on which you are allowed to customize size, bit rate, frame rate, sample rate, and audio channel to your required ones.
Step 4: Edit YouTube videos (Optional)
Some YouTube videos may include ads and other annoying extras, or you may just want to extract some clips in the downloaded YouTube video for conversion. Click “Edit” button and the “Video Editor” window will pop up, then you can do some basic pre-editing work with the tabs like “Trim,” “Crop,” “Text Watermark,” “Image/Video Watermark,” “Effects,” “Subtitle,” etc.

Step 5: Start YouTube to iMovie conversion
Click the big red Convert button on the main interface to start YouTube video to iMovie conversion, this YouTube to iMovie Converter will get the rest done.
When the conversion is done, click "open output folder" to find out the output files. Then you can import YouTube video to iMovie for editing. For new users who just start to use iMovie, you can know how to load video files into iMovie here.


